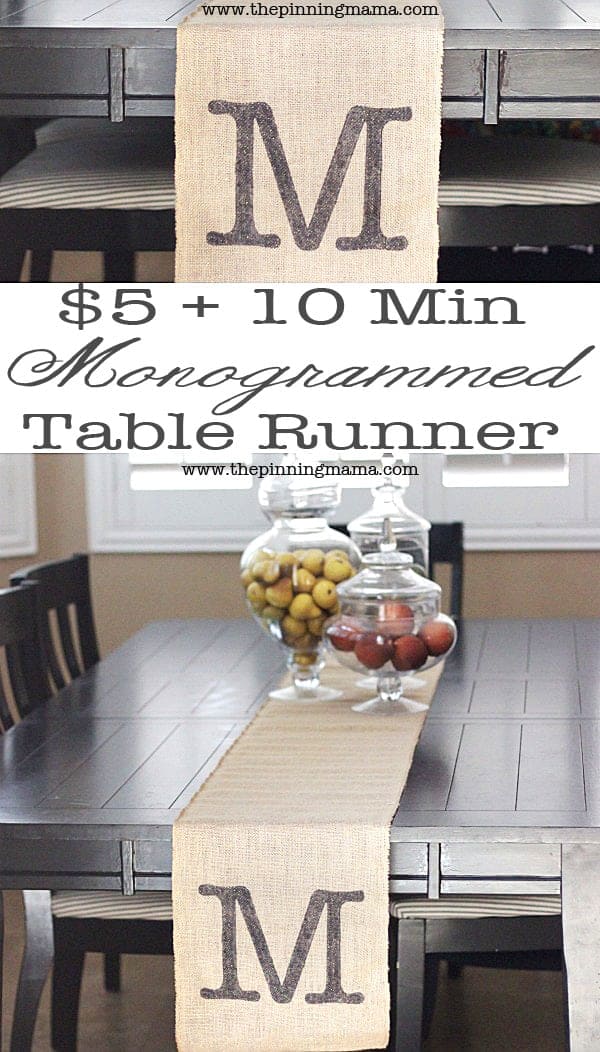
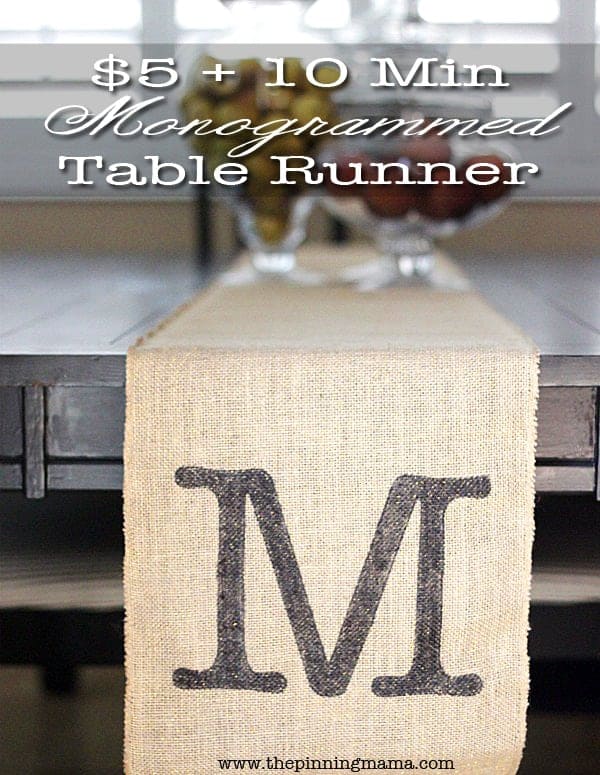
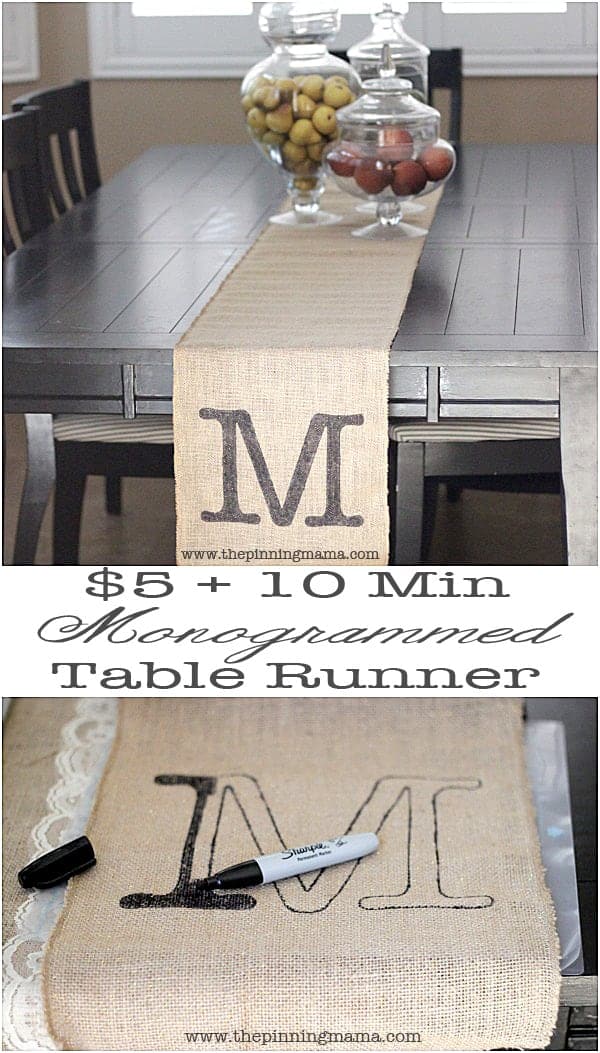
Who knew it was so easy?! $5 and 10 minutes is all you need to create this beautiful custom monogrammed table runner.
This post is brought to you as part of the Silhouette Affiliate program. The project idea, concept, and creation is all cooked up right here at The Pinning Mama.
There is not much better than a project you can prep, make, and clean up all well inside half an hour! Whether you are a busy mom with only nap time to get everything under the sun done, or work full time and are just pooped when you get home this project is so great because it really takes no time, and makes no mess. This monogrammed table runner is so easy to pull together but has such a perfect custom, high end look to it.
I think this is perfect to change things up from the reversible burlap and lace table runner I have on my table now to something more casual for fall. It would also be perfect for a wedding or an inexpensive way to decorate and customize at a baby or bridal shower!
All you need for this project is:
- A stencil in your monogram of choice – I used my Silhouette CAMEO to cut mine
- A burlap table runner- I got mine at Walmart for right at $5, but you can also order this burlap table runner on Amazon for around $6. I also love this linen runner available for only $3!!
- Black Sharpie marker – I prefer this size but any will work
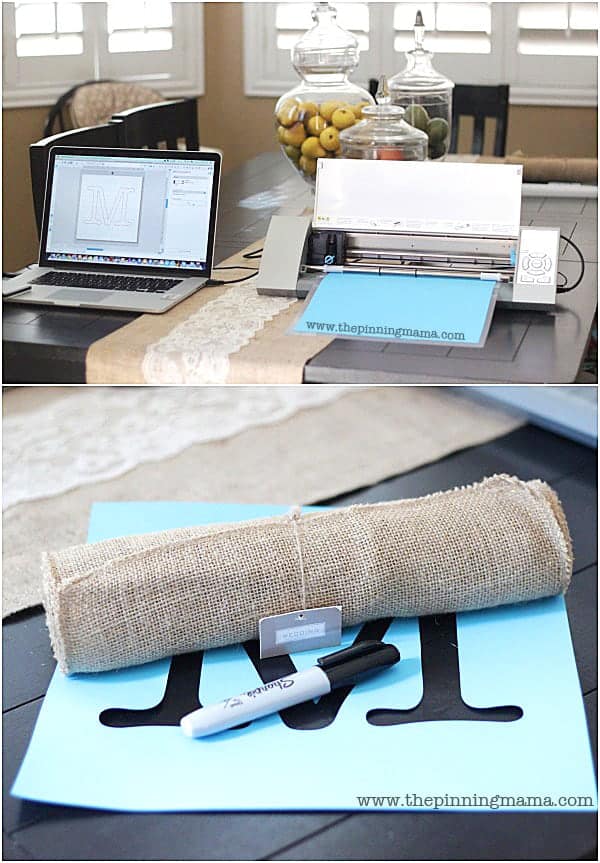
First I cut my monogram out using my Silhouette CAMEO. It took about 2 minutes to open the software and type the letter M, and size it to scale for my runner. Since my runner was 12″ wide, it made it really easy to just cut the M on a standard piece of cardstock which is also 12″ wide. I used the font American Typewriter since I wanted more of a bold typographic look.
Next decide where you want your monogram to go on your runner. I stenciled mine on each end, but you could also choose to do just one in the middle or two offset slightly from the middle. Measure the distance you want your monogram and lay your stencil down. I didn’t bother taping it into place since this was so quick and easy, but if your design is more intricate, you might want to do that since Sharpie is not a very forgiving medium.
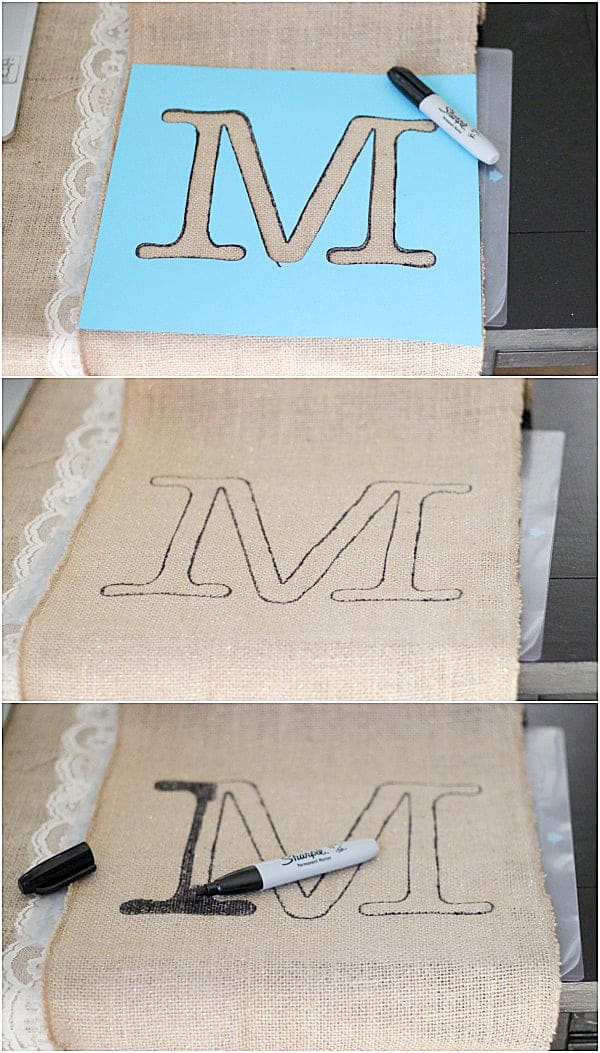
Use your marker to trace along the edges of the stencil until you have gone completely around the design then remove the stencil and fill in the design completely with your Sharpie, making sure that it is evenly filled.
Repeat if desired.
I think that might be the shortest set of directions for a craft I have ever written, but seriously, it is just that easy. What’s not to love about that!?
I love to use my Silhouette CAMEO for all sorts of projects! You can see many of my Silhouette projects here. If you don’t have one yet, there is a great sale this month on the Silhouette Portrait! It is a really awesome and affordable way to get a cutting machine! The Silhouette Portrait does almost everything the CAMEO does, but is just in a smaller package with a smaller price tag. To get these great sale prices go to the Silhouette Sale page here and then use my special coupon code PINNING at checkout to get the discount!


Mary says
Love this idea! I have a couple of those runners from Walmart! But my real question is where is your table from?
Thanks!
Kimber says
I actually got it at a scratch & dent outlet of Value City furniture when we lived in Ohio 10 years ago and we refinished it. I love the look but those grooves drive me crazy with the crumbs!
Suzanne says
I did a Thanksgiving runner similar to yours. Thought I would share.
http://cloudycreations.blogspot.com/2013/11/thanksgiving-burlap-table-runner.html