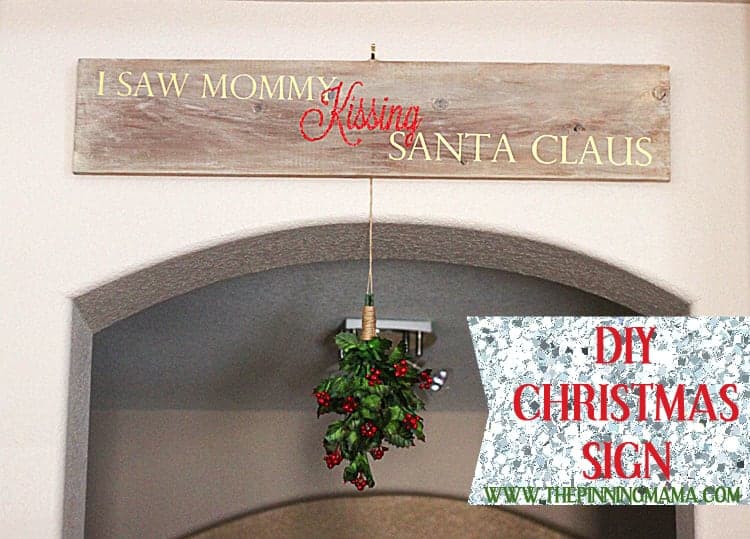
I Saw Mommy Kissing Santa Claus DIY Wooden Sign
Ok… I have been keeping something from you… But now I finally get to tell you, YIPEE! A few weeks ago I was accepted as a new Silhouette Affiliate! This is big news for me because I love sharing with you things that I absolutely LOVE and this is at the tip top of my list. So today, I get to share with you my first project and a HUGE promotion as an affiliate!
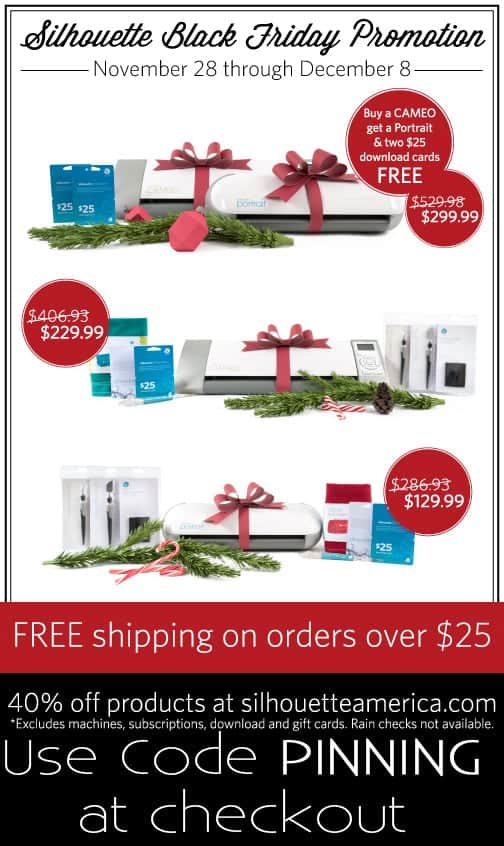
First off let me tell you all about this promotion. I just can’t keep it in, it is SO good! I got really lucky that my first promotion to run for Silhouette is the BIGGEST one they have ever had. To take advantage of these deals, all you have to do it go to the BLACK FRIDAY Silhouette Page here, and then use my promo code PINNING when checking out. Easy peasy! So here’s the skinny on the deals:
(1) A Silhouette CAMEO®, Silhouette Studio® Designer Edition Software, a dust cover (the color is decided by Silhouette), a $25 download card, a hook, a scraper, a spatula, and a pick-me-up® tool for $229.99. Retail price for all of this would total $406.93 (over 40% savings!)
(2) A Silhouette Portrait®, Silhouette Studio® Designer Edition Software, a dust cover (the color is decided by Silhouette), a $25 download card, a hook, a scraper, a spatula, and a pick-me-up® tool for $129.99. Retail price for all of this would total $286.93 (over 40% savings!)
(3) A Silhouette CAMEO®, a Silhouette Portrait®, and two $25 download cards for $299.99. That’s right: If you buy a Silhouette CAMEO® at full price, you get two $25 download cards and a Silhouette Portrait® ABSOLUTELY FREE! Retail price for all of this would be $406.93 (over 40% savings!)
(4) 40% off consumable products at silhouetteamerica.com. This excludes machines, subscriptions, download and gift cards. Cannot be combined with any other offers. Rain checks not available.
(5) FREE SHIPPING on orders over $25.
WOW, right?! If you have even one semi-crafty bone in your body this probably excites you almost as much as it excites me! There is something for everyone! Remember, go to Silhouette’s Black Friday page here and use the Silhouette discount code PINNING. The deals will be active November 28- December 5.
Now, back to the project. This is the first year that we will be staying at our house for Christmas day. Kind of crazy I know, but since graduating, we have always lived far and have never gotten to see our families much so we always made it a priority to travel back for Christmas at the very least. This year though we will be making our own family traditions as we stay put!
Needless to say, with my first entire Christmas season in my own home, I have been going a little crazy decorating. I was ready to start in August (and might have done a project or two wink, wink!) I have been brewing up all sorts of ideas and this one I am sharing with your today, I knew I had to make ASAP.
You know I love distressed signs, so putting one of the most fun Christmas songs I know, I Saw Mommy Kissing Santa Claus, on it with some mistletoe hanging was just meant to be.
Now I have made a few wooden vintage style signs over the past few years, but this was my first time making it using vinyl with the Silhouette. I am sold. I am in love. All other ways of sign making are dead to me now. It was that easy!
Here is what you will need:
- Silhouette Cameo {Order yours at the Silhouette Black Friday Sale. Use coupon code PINNING at checkout}
- Silhouette Premium Gold Vinyl {Order yours for 40% off at the Silhouette Black Friday Sale. Use coupon code PINNING at checkout}
- Silhouette Transfer Paper {Order yours for 40% off at the Silhouette Black Friday Sale. Use coupon code PINNING at checkout}
- 36″x6″ Distressed board {We have two methods on distressing we have done tutorials on here and here}
- Elmer’s Glue
- Fine Red Glitter{I used Recollections glitter from Michaels}
- Jute {I get mine from burlapfabric.com. I love the quality and they have the best prices!}
- Mistletoe floral stems {I picked mine up at Joann’s}
- Scissors
- Staple or glue gun
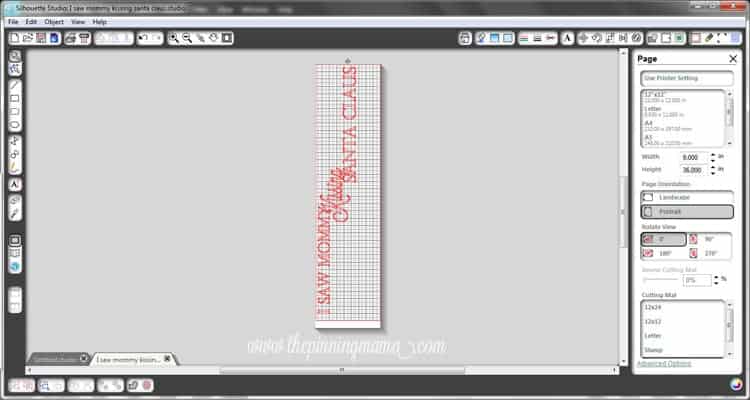
First you will design your wording in the Silhouette Studio Software. It is super easy to use, and you can design with any font on your computer, which is one of the things I LOVE about the Silhouette. You can download my exact cut file for this project here.
Next load your vinyl into the Silhouette and cut out your lettering. You can make a test cut to make sure that the settings are right. I had to readjust my blade to 1 and my cut settings to Speed 6 Thickness 4 for a perfect cut. I was so impressed once I got the settings perfect for the metallic gold vinyl how precise and smoothly it cut everything. I loved working with the vinyl because it came in a 10′ roll which allowed me to cut the wording for the entire length of the sign in one piece. It made life SO much easier not to have to piece wording together!
And this vinyl… oh this vinyl. It is GORGEOUS! The metallic sheen is so beautiful. It is creamy and at the same time dances in the light and seems to make the lettering bounce right off of the board! You will love it!
After you have your vinyl cut, use scissors to cut around the wording and then peel off the excess vinyl that is part of your lettering.
Now you will use either transfer paper or contact paper to move the lettering from the backing of the vinyl to where we want it on the board. To do this cut your transfer paper to roughly the same size as your lettering. Peel back the backing for the transfer paper and stick it onto the lettering. Use your finger or a scraper tool to push down really well on the lettering so that it sticks to the transfer paper.
Now carefully peel up the transfer paper making sure that the front side of each letter is now adhered to the transfer paper and is peeling off the backing.
Once you have all of your wording onto the transfer paper, line it up on the board exactly where you want it and then press firmly all over paying special attention to pressing the letters.
You should be able to peel up the transfer paper now leaving your lettering perfectly placed on your board.
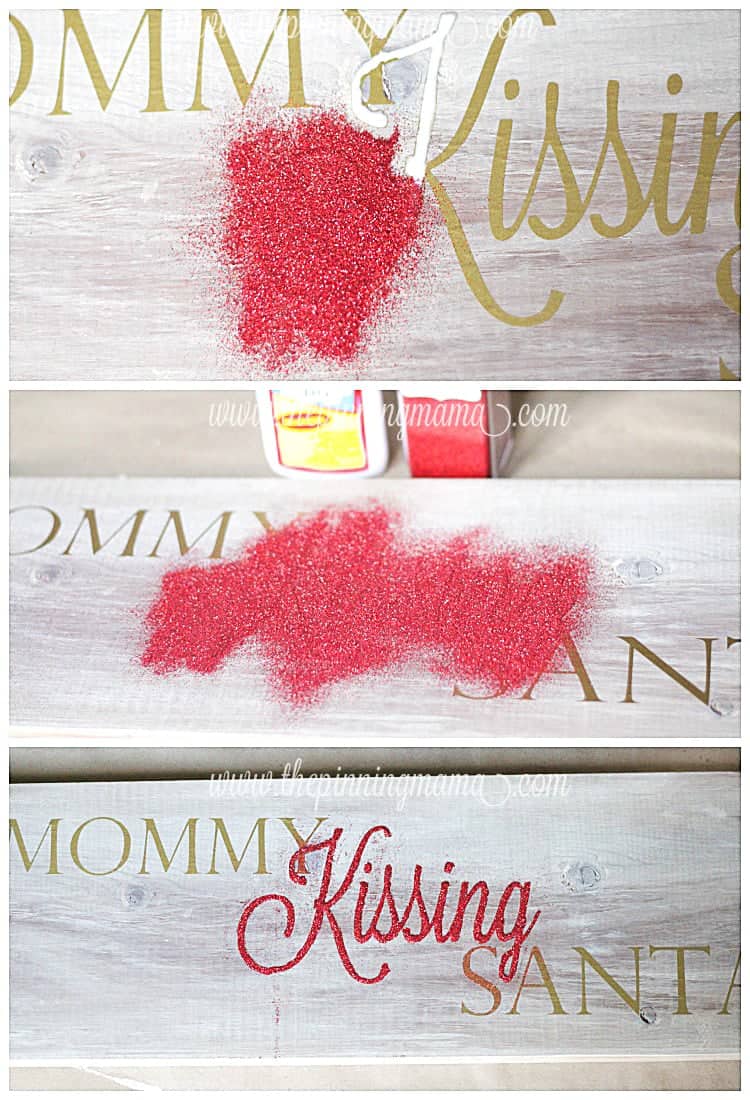
To add a little more pizazz to my sign I added some red glitter to the word kissing. The vinyl also makes this super simple.
Use your Elmer’s glue to trace the letter’s you want to glitter coating the letter with a thin coat of glue. Then sprinkle the glue with your fine red glitter and let dry.
While your I Saw Mommy Kissing Santa Claus sign is drying, put together your floral stems and wind your jute tightly around the stems. I made the winding around 2 inches long so it looked nice and substantial. Cut the string and leave a nice long tail to hang it.
I attached my strings to the middle of the back of the board using a staple gun. You could also use a glue gun.
Now you are done and all you need to do is hang her up and find that special man to lure under the mistletoe!
So there it is! My first official Silhouette project! I am absolutely loving my Silhouette and in the few weeks I have had it I have used it more than any other crafting product I have… except maybe my paint brush 🙂 Make sure and check back often this week as I will be posting all sorts of Christmas decor and many many more Silhouette projects! {Also– I have a special Pinterest board just for all of my Silhouette tips, tricks, projects and inspirations. If you need a little inspiration of your own, I would love for you to follow!}
Take me to the Silhouette Black Friday Sale! Use Coupon Code PINNING at check out!


Michelle says
Love it! What a cool project!! I haven’t even started decorating for the holidays…or even thought about it! I am so far behind!
Kimber says
I think I am just so far ahead this year Michelle! Which is pretty funny since I feel constantly behind at any and every given moment of time!
Claudine says
I just made this…so easy and beautiful! Thanks!
Kimber says
Thanks for stopping by and leaving us a note Claudine! I know your sign looks awesome in your house too!!
Jen says
Such a cute and unique gift or decoration. Love it!
Kimber says
Thanks Jen! I love the finished product! You know you just hope it comes out how you are picturing in your mind haha!
Dee Williamson says
What a great idea! Super cute. I think I need a Silhouette now. It seems to do more than a Cricut.
Kimber says
Dee, I love my Silhouette. Seriously… L-O-V-E! I upgraded from an older model Cricut so it was a huge upgrade for me, but it really can sing and dance. I haven’t found very many limitations so far!
Dee Williamson says
So is it always connected to your computer when you want to work with it? I think the Cricut has this feature, but I’ve never tried it.
Kimber says
It is always connected to the computer. I usually design my projects on the computer whenever and then just hook it up right when I am ready to cut.