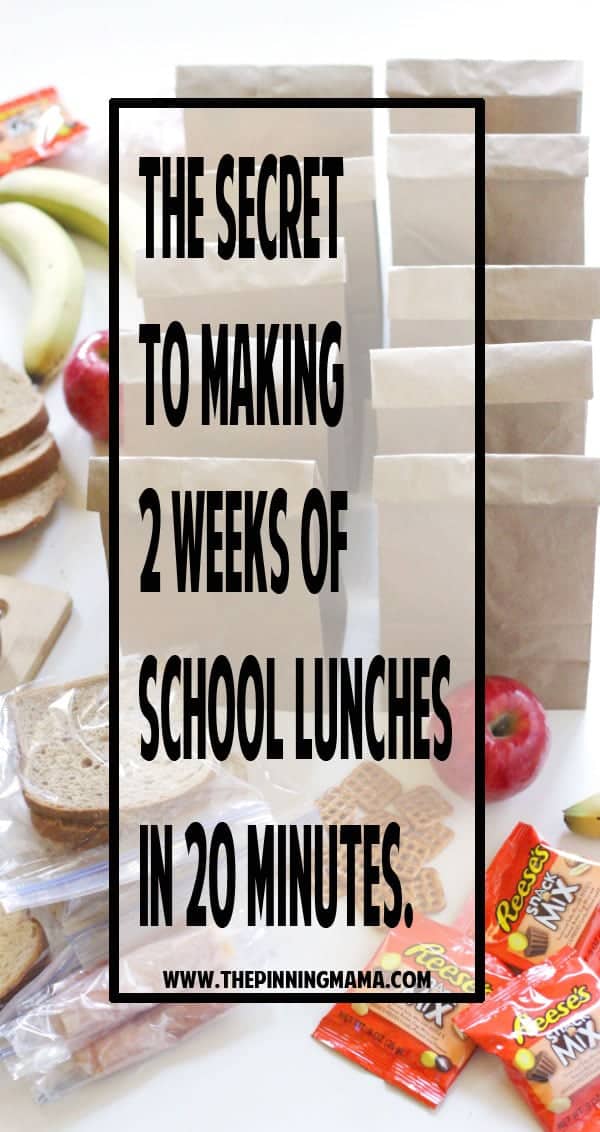
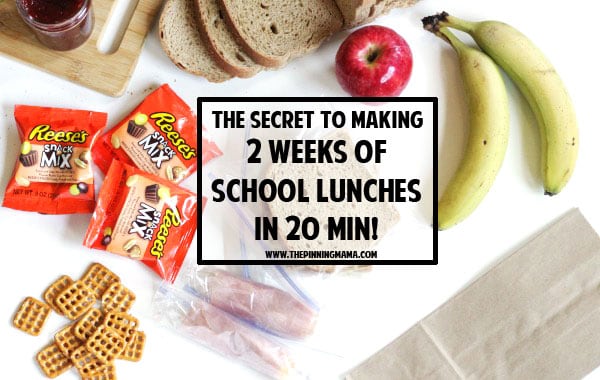
Learn the secret I use to make two weeks of school lunches in as little as 20 minutes! This makes morning so much easier and less stressful for moms and kids and it is so easy to do!
They say it takes a village to raise a family and never have I known this to be true more than this past year as my first son started school and I still had two little ones at home. Juggling all of the kids, the schedules, and the lunches was hard…. really hard. Everyone always needed something or to be somewhere and never at the same time.
If I figured out one thing this past year, it was that I needed to simplify where I could, to help my day run smoother and help me take care of everyone more easily. I have a good friend named Kristin. One of the things I love about her is that although, I know she has stressful days and it is never as easy as it looks, she is one that just mothers seamlessly. She has 2 girls that she has raised to be beautiful, bright, wonderfully responsible, and best of all, she never looks as stressed as I feel! One tip I got from Kristin was that she had her girls make a weeks worth of lunches at once on the weekend. Then they when morning came they were ready to go without having to stay up late to make it during the bedtime rush, or wake up early in the middle of the get ready for school and out the door stress.
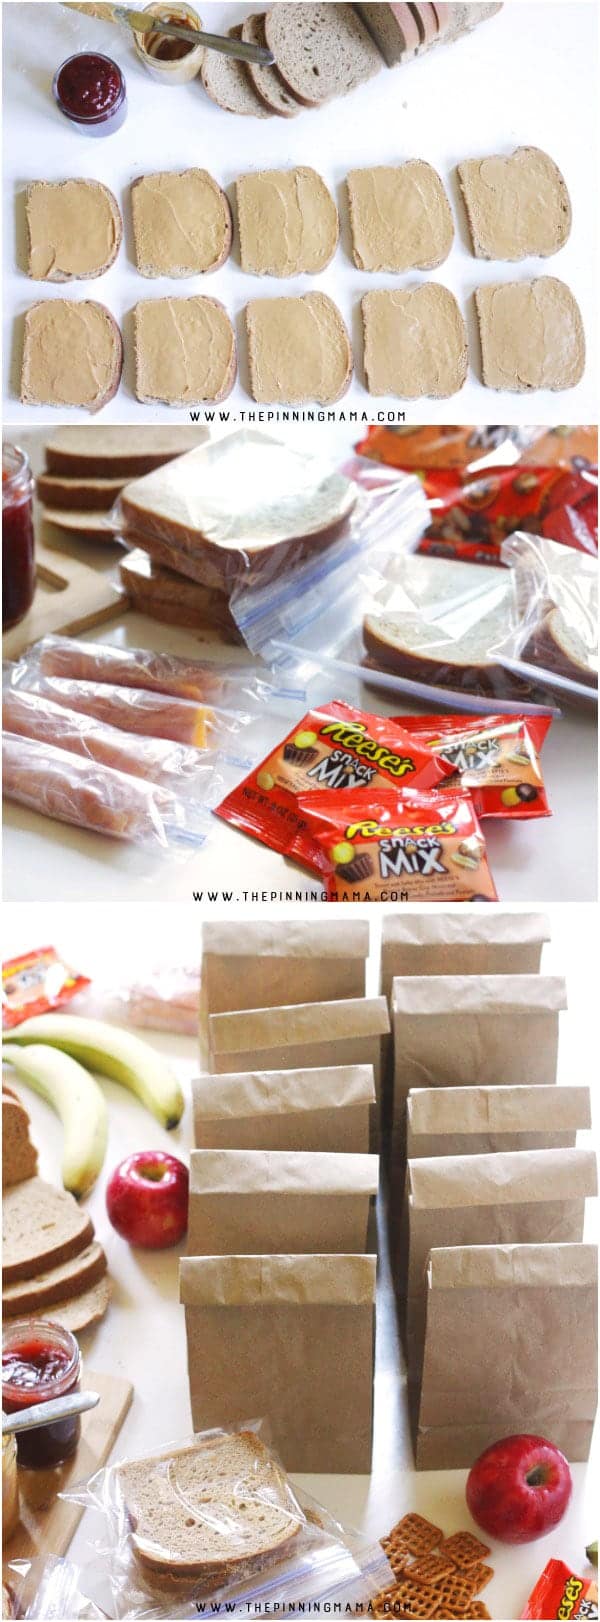
I absolutely loved this idea and we kind of put our own spin on it this past year to make our own version of this school lunch hack for my mom bag of tricks. The secret: freezer versions of our lunch favorites combined with simple snack favorites like fruit and REESE’S Snack Mix Snack Size we keep on hand. We created a few freezer friendly recipes and a list of go to snacks and make two weeks worth of lunches at a time. We can do this over the weekend and depending on what we decide to make, have it done and to the freezer in as little as 20 minutes! That my friends is a huge time saver, and more importantly, stress saver.
How to Make 2 Weeks of Lunches in 20 Minutes
You can make many different types of “main courses” freezer friendly to prep ahead but our 3 go to’s are:
- PB&J Sandwiches – with the little trick I detail below these freeze beautifully and are my kids absolute favorite.
- Meat & Cheese Sandwiches – This is a great way to switch it up because you have endless options on what to fill it with and freezes great when made as detailed below!
- Meat & Cheese Roll ups – These make not only a great lunch but also a great option for a snack for kids who have longer school days.
Here are my best tips on prepping the lunches, then below, see how to make each type of dish freezer friendly!
My lunches usually contain 3-4 items:
- Main dish
- Fruit or veggie
- Snack or Treat – I like REESE’S Snack Mix Snack Size (sold exclusively at CVS) because it is a little of both with a sweet & salty mix of REESE’S Peanut Butter Cup Minis, REESE’S PIECES Candy, Roasted Salted Peanuts & Mini Pretzels.
- Optional- crackers, snacking cereal, pretzels, chips
- I like to make two weeks of lunches at a time (10 sandwiches) because most loaves of bread contain at least 20 slices of bread which is perfect to make 10 sandwiches. Bread can vary, so make sure to check how may slices are in the type of bread you like to buy. Also, this seems to be the perfect amount of food to stay fresh and no take too much time to make.
- Make all of one kind or switch it up. It is the quickest to make all of one kind of sandwich, but with just a few extra minutes you can make several different kinds of freezer friendly main dishes and have a variety to switch up what you take to lunch every day.
- Keep easy snack sized treats like REESE’S Snack Mix on hand. This makes it super easy to grab and go in the morning with a sandwich, or meat & cheese roll up, and a piece of fruit, throw it all in the lunch box and go. You can also keep the main dish and snack mix in a paper bag in the freezer and just add the fruit right before you leave the house as an even quicker option if you have the freezer space. (REESE’S Snack Mix Snack Size sold exclusively at CVS)
- Stock up every week or two on fresh fruit for the lunch box. You can use fruit or veggies, but I prefer fruit since many of them like apples and bananas are a perfect portion and don’t need to be prepped or repackaged. If you want to buy for two weeks at a time, both of these will stay good in the refrigerator for that time period. The skin on the bananas do brown, but the fruit stays nice and fresh! DO NOT FREEZE THESE FRUITS.
- Keep other individuals on hand to switch it up. Some things we like are: cheese sticks or cubes, yogurts, baby carrots, smoothies, etc.
- As kids grow and eat more scale it! If you have hungrier kiddos, you can do double meat and cheese, extra roll ups, or a few extras as snacks in the lunch box.
- Have the kids help or do it as a weekly chore. As you will see below making these lunches is super simple! Even my kindergartener can make these sandwiches. Help your kids learn responsibility for themselves by making freezer meal prep for lunches one of their chores every other week!
Now let’s get prepping!
How to Make Freezer Friendly Peanut Butter & Jelly Sandwiches
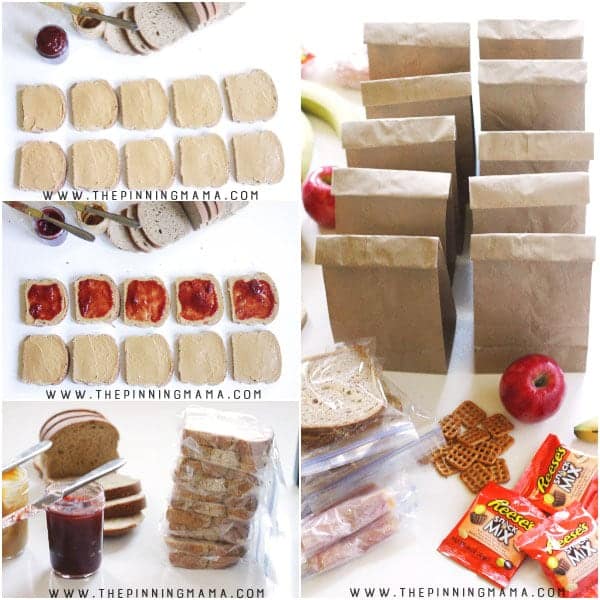
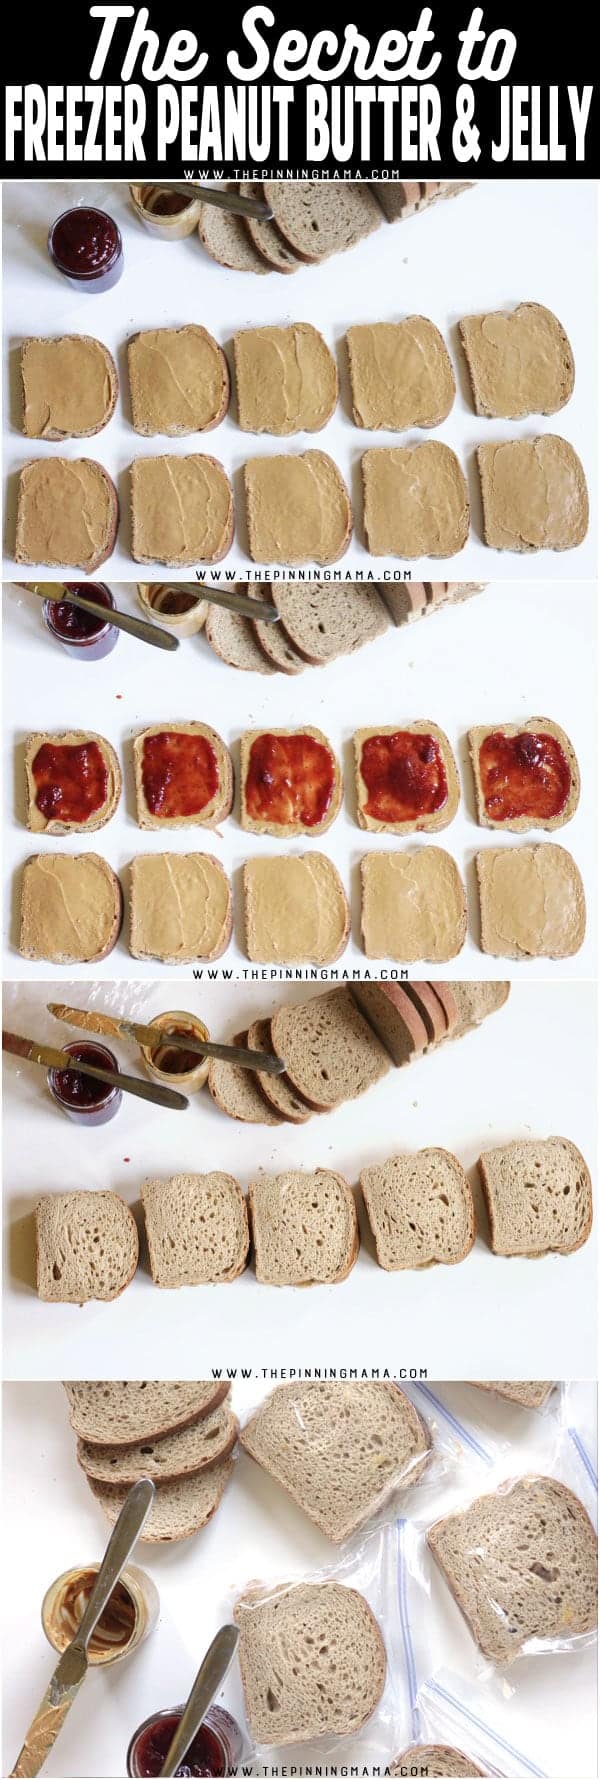
Although you can’t make PB&J the normal way and just throw it in the freezer with good results, the secret to a non-soggy freezer peanut butter and jelly sandwich is super simple! Just add peanut butter to both sides of the bread to “seal it,” then add the jelly to the middle.
Step by step instructions for Freezer Friendly Peanut Butter & Jelly Sandwiches:
- Lay out 20 slices of bread in 2 rows of 10
- Spread peanut butter to coat one side of each slice of bread fully.
- Spread the jelly inside the peanut butter leaving a 1/2 inch boarder on 10 of the slices.
- Place the peanut butter only slices on top of the jelly slices and press around the edges gently to seal the jelly in.
- Place in an airtight container or zipper top bag and place in the freezer.
How to Make Freezer Friendly Meat & Cheese Sandwiches
Much like the PB&J, meat and cheese sandwiches freeze beautifully when you follow a few basic rules. Almost all meats and cheese freeze well as long as it is presliced before frozen so you can use deli sliced ham, turkey, chicken, pepperoni, provolone, cheddar, american, mozzarella, or whatever your kids love.
Step by step instructions for Freezer Friendly Meat & Cheese Sandwiches:
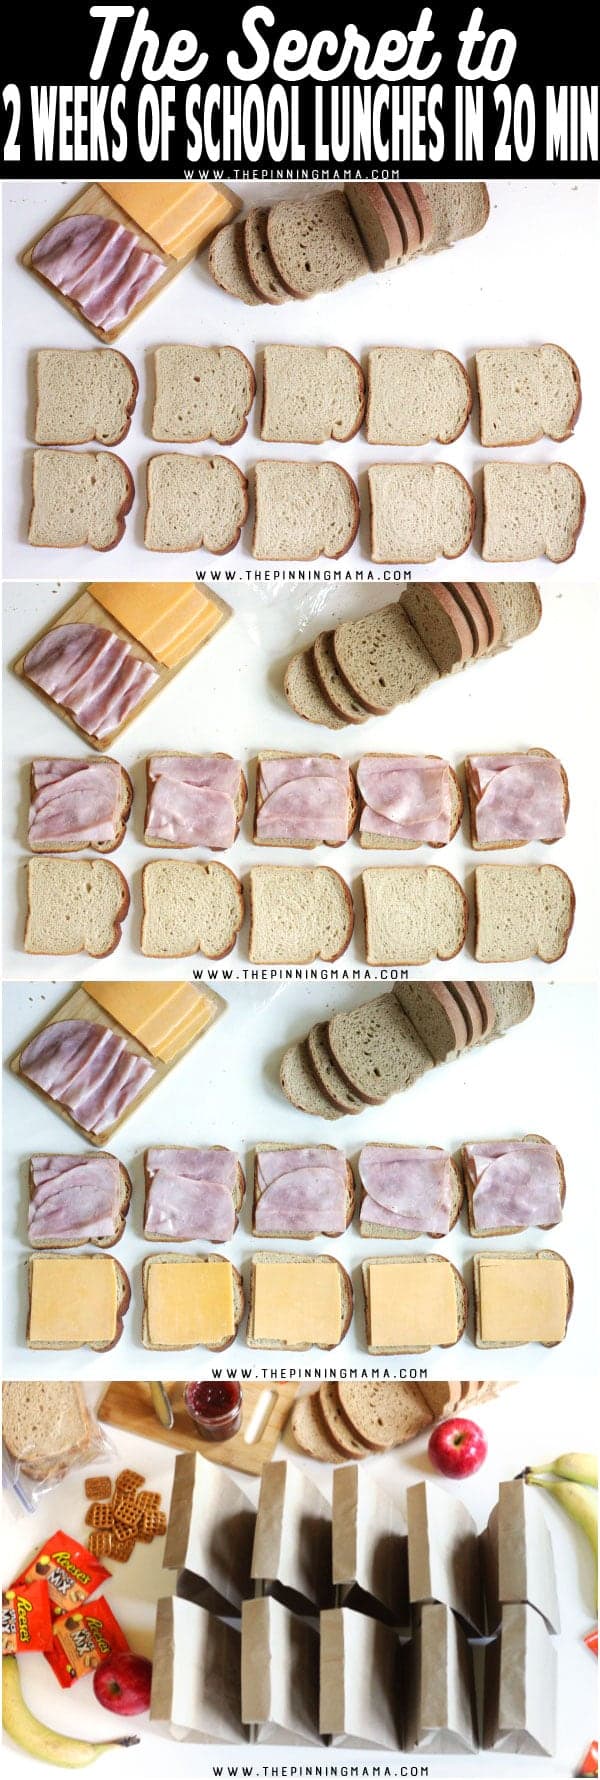
- Lay out 20 slices of bread in 2 rows of 10
- Place the meat on 10 slices of the bread. I use 2 slices of meat, but you can use as much or little as desired. Tip: fold meat and place the straight edge to the outside to keep all the meat in the bread.
- Place the cheese on 10 slices of the bread. I use 1 slice of cheese, but you can use as much or little as desired.
- Place the two sides of the bread together to form 10 sandwiches.
- Place in an airtight container or zipper top bag and place in the freezer.
IMPORTANT: Leave condiments and additional veggies off the sandwich to freeze. You can put these in the lunch box on the side if you want to add them to the sandwich.
How to Make Freezer Friendly Meat & Cheese Roll Ups
I love these as a fun alternative to a sandwich and you can use any of your favorite deli meats or cheeses to make them. If you use cheese slices, I have found that it is helpful for them to be super fresh, and to let them warm from the refrigerator a bit to roll well.
Step by step instructions for Freezer Friendly Meat and Cheese Roll Ups:
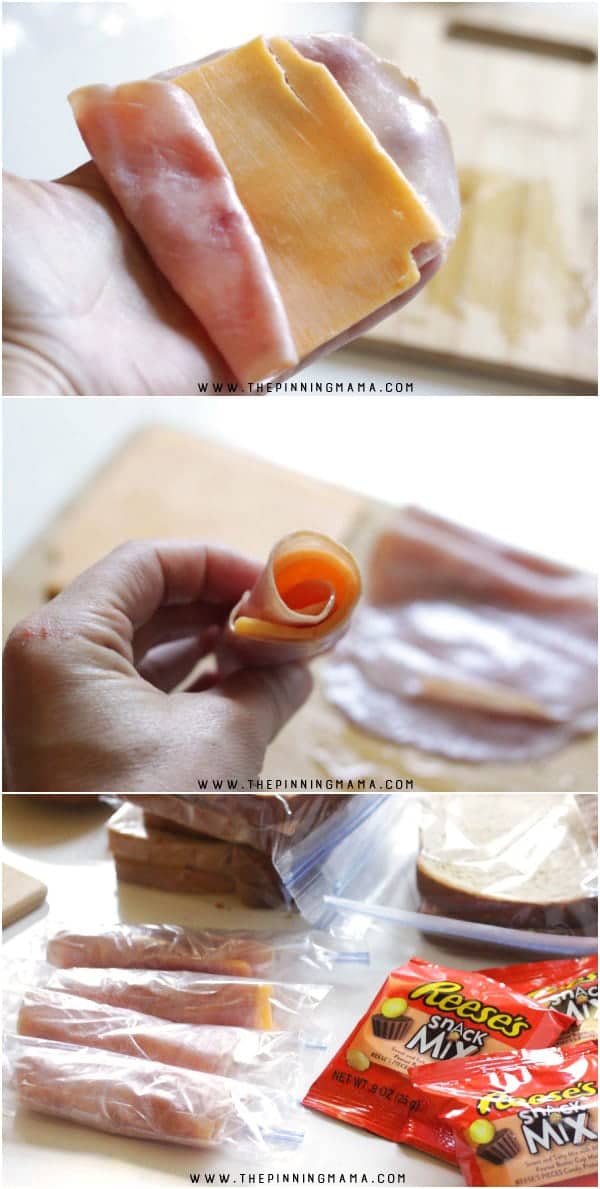
- Grab 10 slices of deli meat and 10 slices of cheese (or double it for a heartier meal.)
- Place a slice of meat flat and then the slice of cheese flat on top of it.
- Start from one side and gently roll it up until you reach the other end.
- Store seam side down in an air tight container or zipper bag in the freezer.
- Add single serving condiments for dipping in the lunch bag if desired.
Super easy as promised! So go grab the ingredients for your kids favorites on your next trip to the store and then have your kiddos start making school morning easy and stress free from prepping lunch ahead!
Do you have any freezer friendly lunch favorites?! Let me know in the comments!
This is a sponsored conversation written by me on behalf of Reese’s. The opinions and text are all mine.



Wendy says
Wow, these sound great! Do you put them in the fridge the night before or do you send them frozen the day of?
Kimber says
Hi Wendy- I send it straight out of the freezer. I find that it keeps it cool through the morning and is perfectly thawed for lunch. Hope this saves you as much time as me!
Katie Sparkman says
Do you put an ice pack in the lunch box or just let the frozen sandwich be the cold in the lunch box?
Darnesha says
Have your kids complained any about soggy bread with this? I’ve done make ahead sandwiches & places them in the fridge on Sunday but by day 3 (Wednesday) the sanding have gone soggy, or no longer taste fresh?
Any tips on this?
Kimber says
Darnesha- The key is to freeze them! When it freezes the moisture can’t escape into the bread. I remove them from the freezer and put them straight into the lunch box. By the time their lunch rolls around it is thawed! Also, I have some notes in the post about what will and won’t work with this method so make sure to read those! Hope this helps!
Diane Flora says
Do you think this will work with Nutella? I am totally going to try this when school starts this year!! Thanks for the tips.