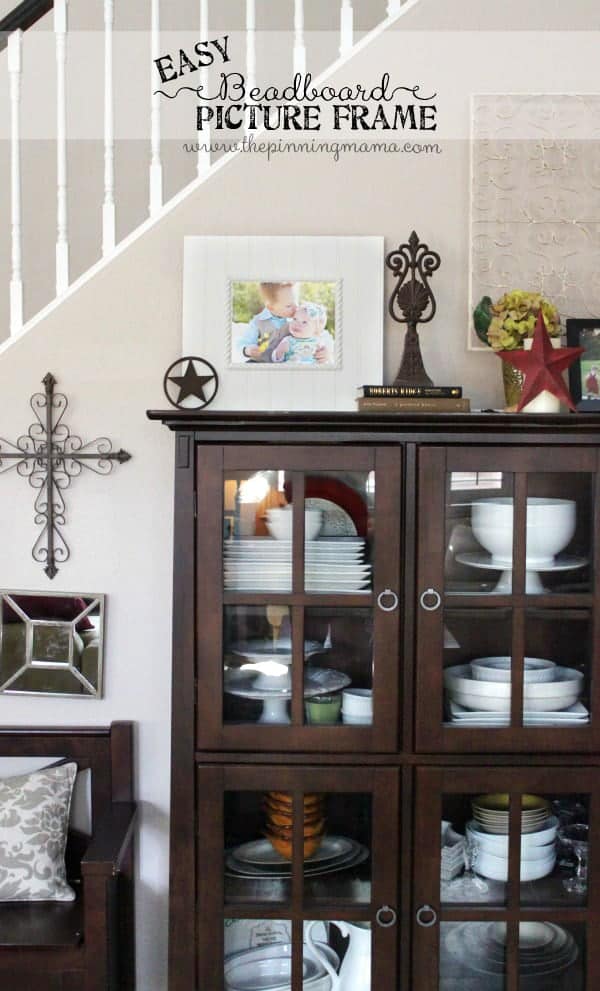
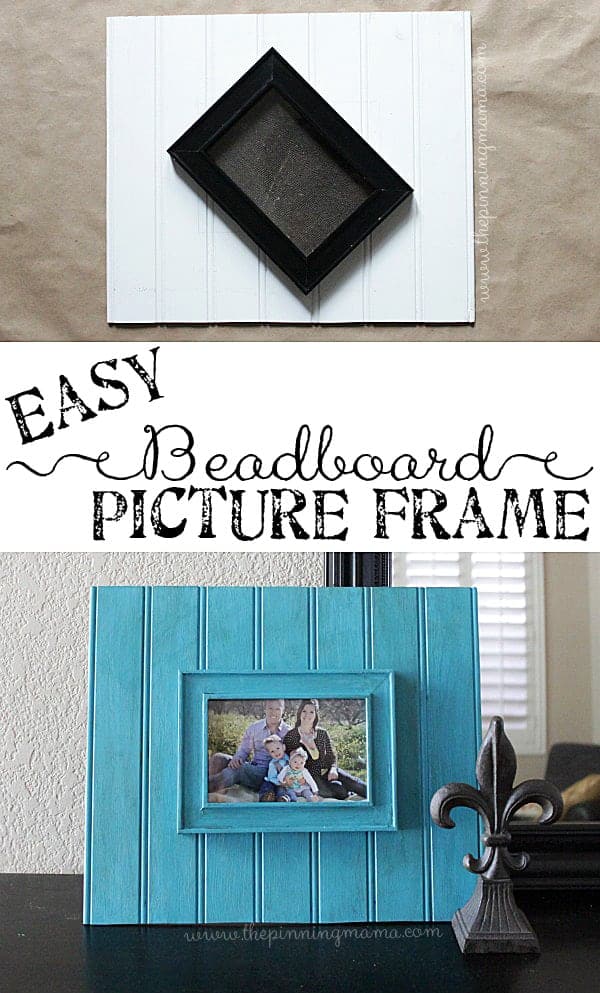
Make an easy beadboard picture frame, two ways, in just a few steps! Upcycle an old frame to give a chunky layered look to your beadboard frame, or use a piece of rope molding for a classic style beadboard frame. These frames are a beautiful and meaningful gift to show your mom how much she means to you!
This post is sponsored by Martha Stewart Living in support of the March of Dimes imbornto campaign. My excitement for the opportunity to support the March of Dimes’ cause that celebrates moms and helps babies thrive is 100% my own!
The March of Dimes imbornto campaign is a powerful way we can all do something to help impact the lives of babies everywhere, because all babies are born to do great things. March of Dimes is helping babies start life healthy and strong, and with the Martha Stewart #THX2U movement, it has never been easier to be a part of this great cause. One way is to post a baby picture of your child, grandchild, or yourself on Instagram or Twitter with the hashtag #THX2U, and Martha Stewart Living Omnimedia and Meredith Corporation will attribute $10 of a $350,000 donation to the March of Dimes! Since there has been no greater bond with my mom than when I also became a mother, I shared this photo on my Instagram.
You can also join the movement by visiting your local Bon-Ton Store, where you will receive a $10-off coupon for every $3 donation you make to the March of Dimes at checkout. You can find out more details and other ways to contribute at imbornto.com. In addition to participating in the imbornto campaign, I am also thanking my mom this Mother’s Day with a DIY gift – an easy beadboard picture frame, two ways! You can upcycle an old frame to give a chunky layered look to a beadboard frame, or you can use a piece of rope molding for a classic style beadboard frame. These frames are a beautiful gift to give any mom for Mother’s Day!
Gift giving is something I have always LOVED to do. I cherish the ability to pick out something that I know will be really meaningful. Every year as Mother’s Day rolls around, it is harder and harder to find something that my mom will love. Gone are the days of macaroni necklaces and scribbled pictures. As hard as I have tried to come up with things my mom will love, sometimes simple can be the most meaningful.
This year I made these simple frames filled with a picture of our family. No gadgets to toss into a drawer, and no flowers that will wilt, but something that shows off the people she holds dearest in a beautiful way. Since there has been no greater bond with my mom than when I also became a mother, I also shared this photo on my Instagram with the #THX2U hashtag which means that Martha Stewart Living Omnimedia and Meredith Corporation will attribute $10 of a $350,000 donation to the March of Dimes imbornto® campaign that helps babies to be born strong and healthy through research, vaccines, education and breakthroughs.
I first saw beadboard picture frames in a boutique store near our home. I loved the style, but of course had my mind churning with ideas on how I could DIY these frames to make them even better. I love how they are substantial and really set off the picture with the wide frame, but the inner frame adds detail. They are beautiful enough to make a great gift, but simple enough to make even when you have 3 small kids climbing on you!
I made the frames 2 ways, but both really only have 4 main steps to them.
1. Purchase and cut your beadboard and molding.
2. Glue your pieces in place.
3. Paint your frame
4. Assemble and add pictures.
Sounds simple as promised, huh?!
Let’s dive into the details!
To make a beadboard picture frame using an old picture frame:
1. Purchase and cut your beadboard and dig out an old picture frame: Purchase a sheet of beadboard at your local hardware store. I got a sheet of 3’x4′ for a little less than $10. Then, dig out or buy a frame in the size you want your photo.
If you have tools at home, you can cut the materials there. If you don’t have them, or don’t feel comfortable using them, most every hardware store will make simple cuts like these for free or a small charge. This is a super easy way to do projects even if you aren’t super handy with tools.
You will want your beadboard cut about 3-4 inches wider on each side than the outside of the frame you are using. You will need to measure the frame’s total length and width and then add 6-8″ onto that measurement for the size of your beadboard.
Disassemble the picture frame. Take the stand piece off and remove the joint that secures it to the frame if there is one so that you now have the stand piece, the back of the frame, and the frame and glass piece. Cut down the back board piece of the frame slightly if it isn’t able to easily be placed into the frame.
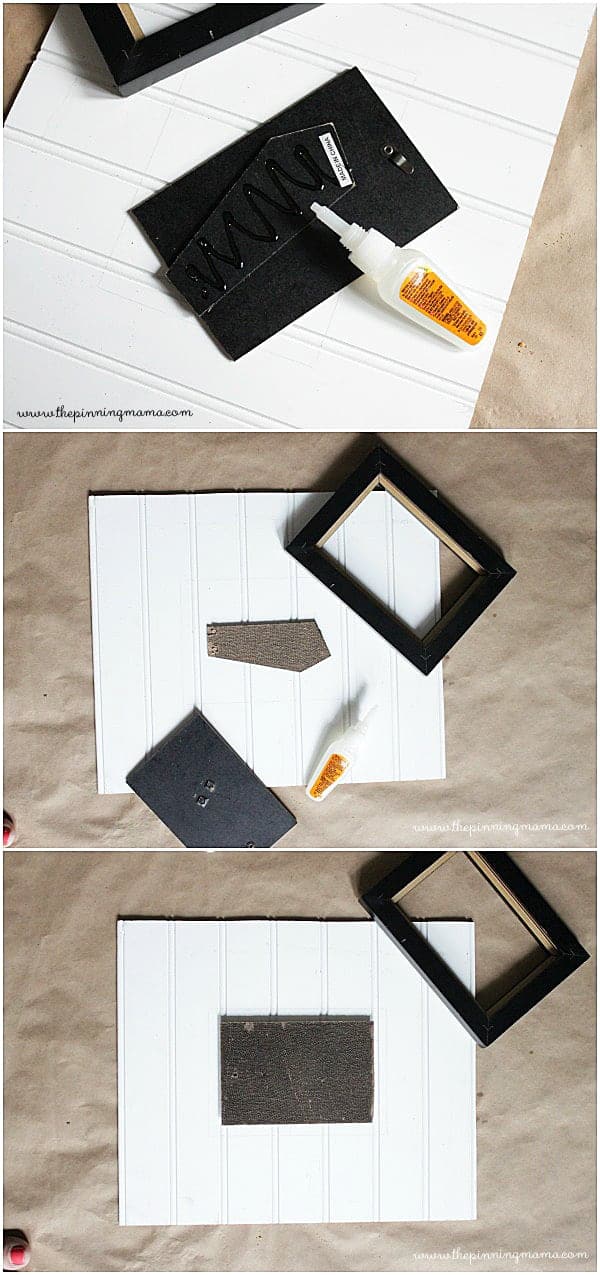
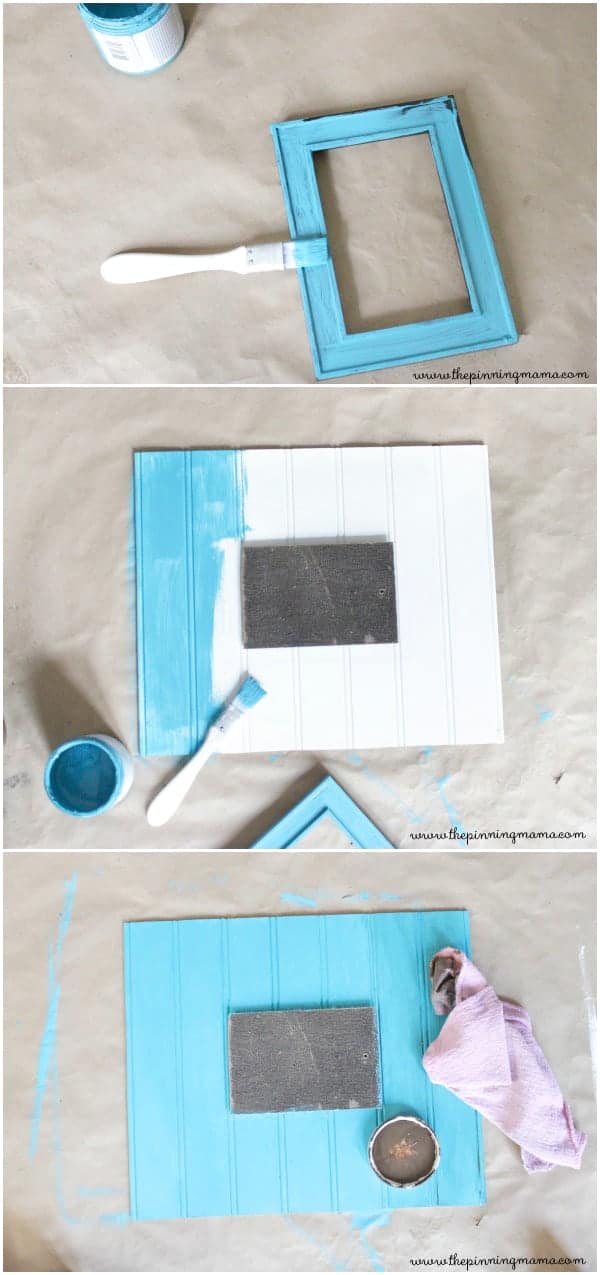
3. Paint your frame: Paint both the beadboard piece and the frame piece separately. I used 2 coats of chalky finish paint and then went over it with dark wax using a rag to bring out the detail of the frame and add character.
4. Add you photo: Once the paint has dried you can place the glass back in the frame and then the picture behind the glass. Set the beadboard upright and then slide your frame back onto the back board piece to create the chunky look on the beadboard.
To make a beadboard picture frame with rope molding:
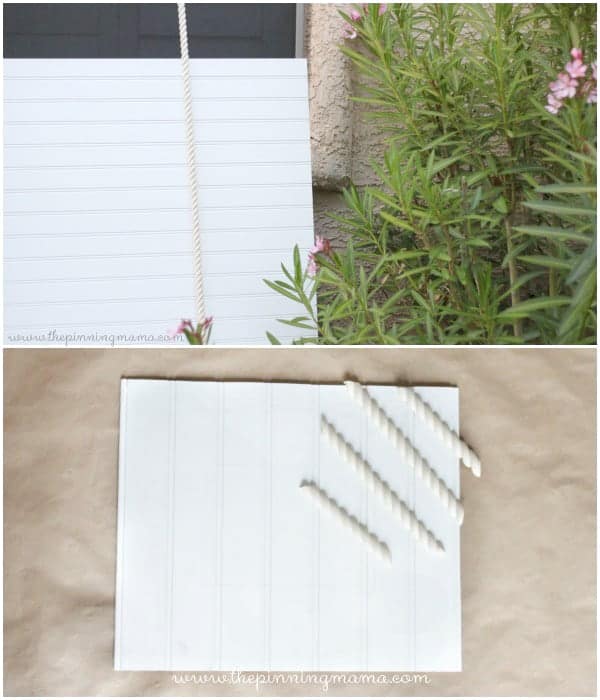
1. Purchase and cut your beadboard and molding: Purchase a sheet of beadboard at your local hardware store. I got a sheet of 3’x4′ for a little less than $10. Also, buy a long strip of thin molding. I love the detail of the rope look so that is what I picked, but you can use any thin molding you like.
If you have tools at home, you can cut the materials there. If you don’t have them, or don’t feel comfortable using them, most every hardware store will make simple cuts like these for free or a small charge. This is a super easy way to do projects even if you aren’t super handy with tools.
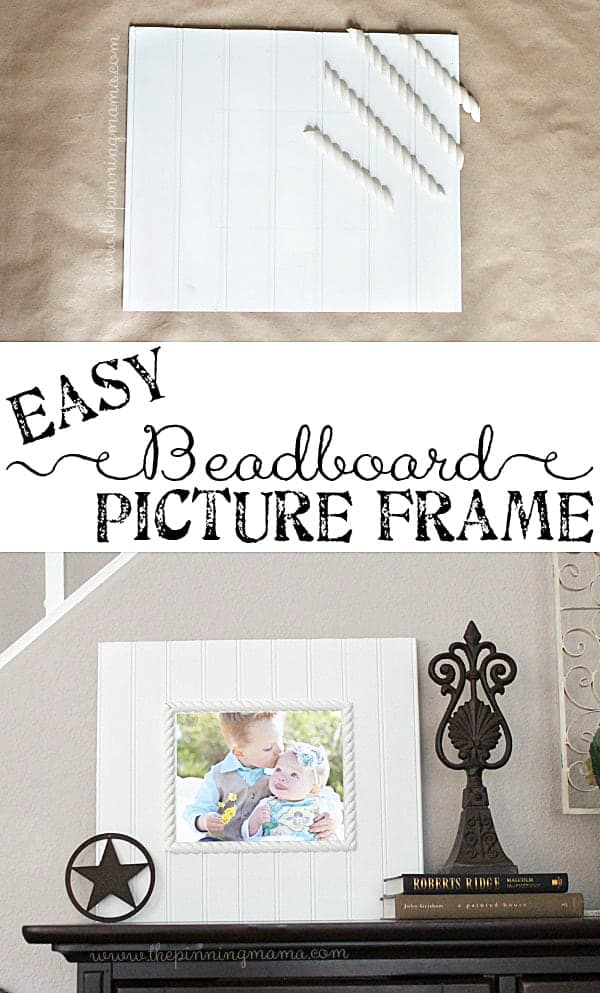
You will want your beadboard cut about 3 inches wider on each side than the picture you are using. So if you want to frame an 8×10 photo, you will want to cut your beadboard about 14″x16″. Then cut your molding slightly larger than each side of your picture so that your picture will be able to fit inside the frame the molding creates without having to trim it. Make sure to cut the edges of each piece at a 45˚ angle so the pieces can form a corner.
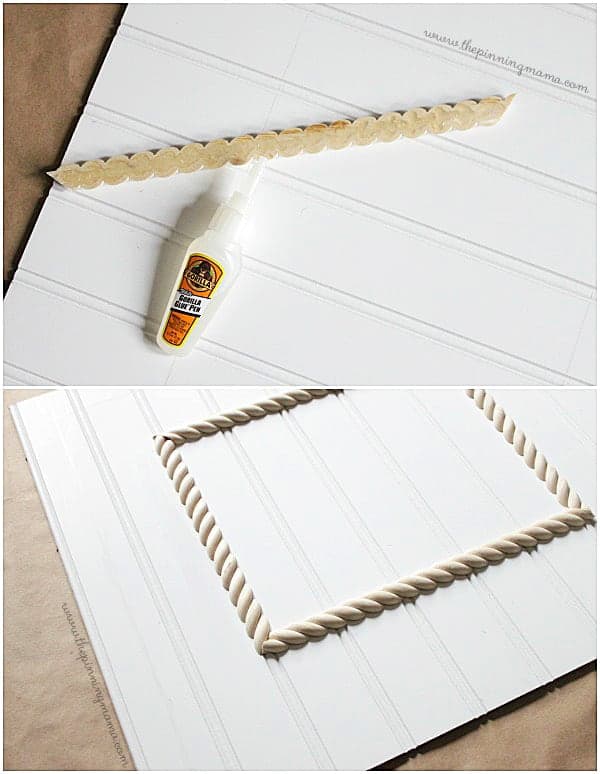
2. Glue your pieces in place: Find the center of your beadboard then, arrange your molding in place to form the frame. One by one, turn each piece over and apply a small amount of Gorilla Glue. You have to be careful when applying the glue to the thin molding because it expands as it dries and will come out of the sides and show on your finished frame if you apply too much. Use a thin line of glue on the back of each piece and place them back in place lining up the corners. Once you have applied glue to all of them set a book on top of it and place it in a nice flat space to dry for about 30-60 minutes.
3. Paint your frame: Once the glue has dried you can paint the frame. I chose to stay with a classic white on this frame. I used a chalky finish paint to cover the entire frame from top to bottom with two thin coats, letting each dry in between.
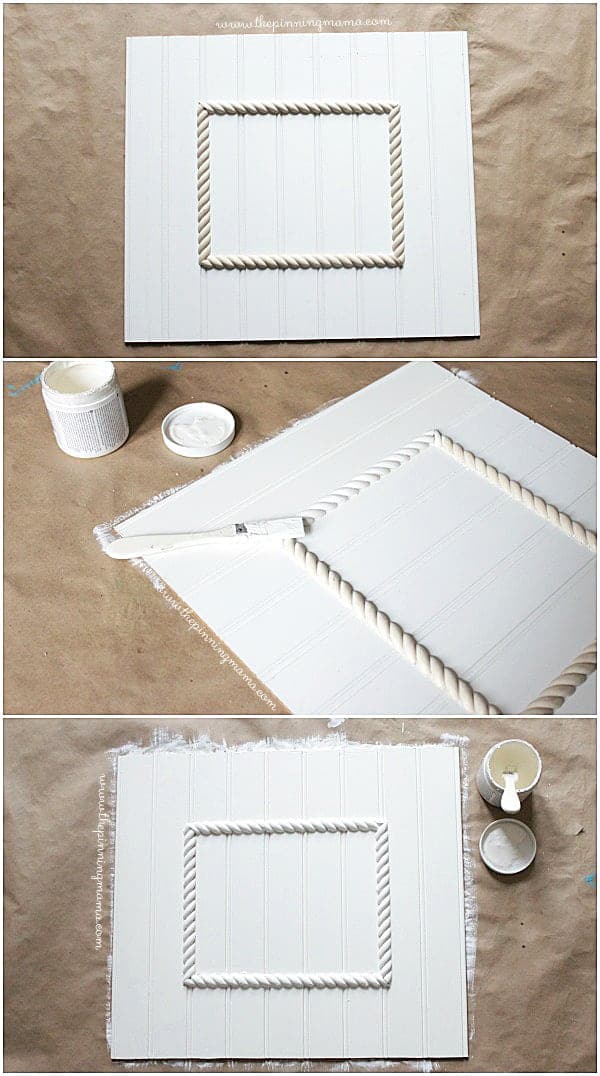
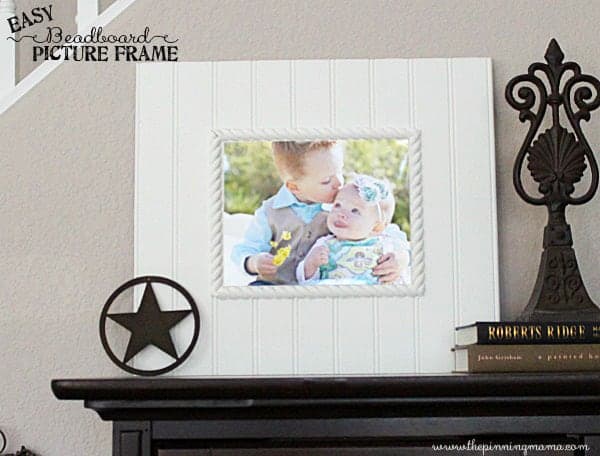
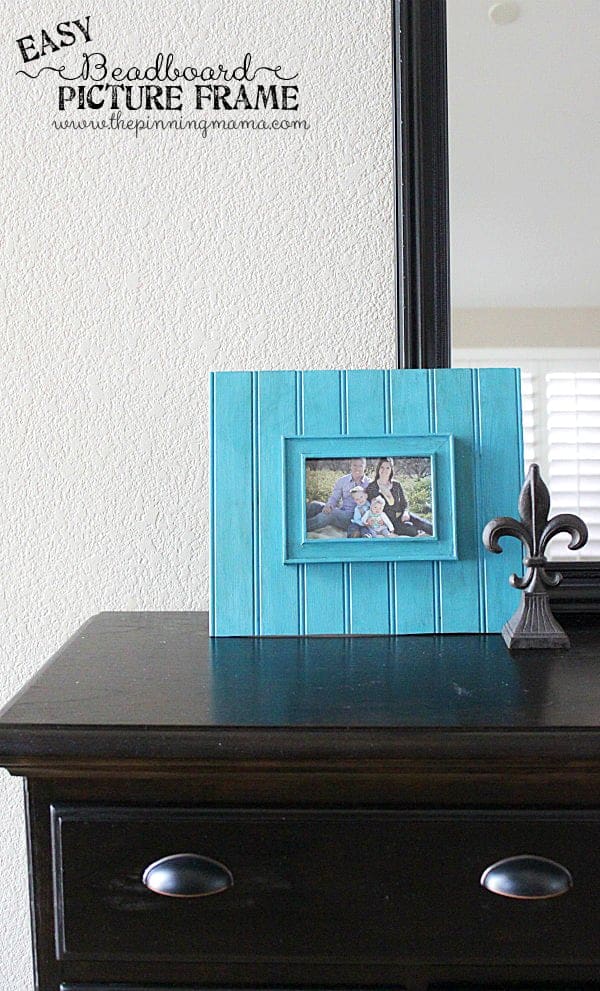
Each frame is simple to create and can be done in just a couple of hours from start to finish, even including drying time! Lucky for me, they also make a beautiful and thoughtful gift, especially when they are filled with pictures of my sweet babies to give to my mom.
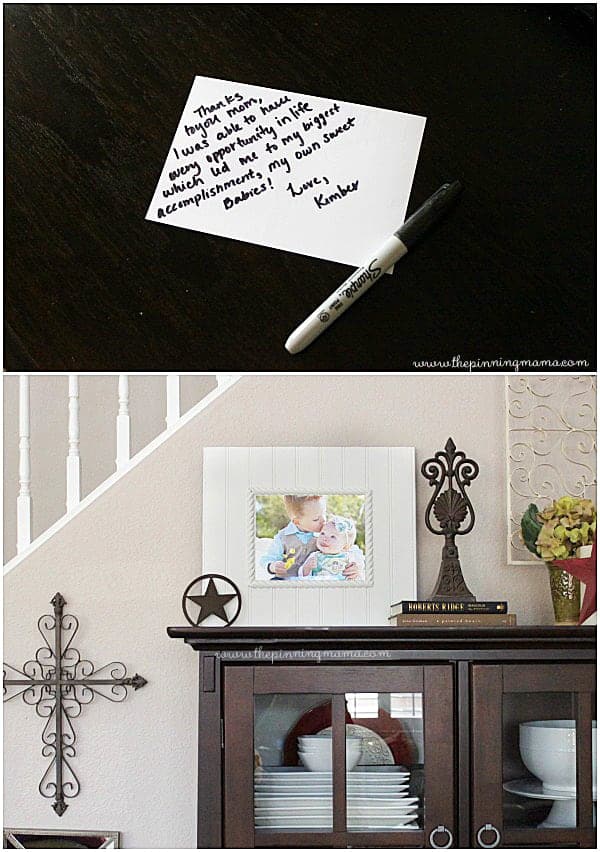
Becoming a mother myself has given me a whole new perspective on a lot of things and one of those is being thankful that no matter what our situation was, my parents always gave me every opportunity. I got to do a lot of things in my lifetime but they all pale in comparison to having kids myself. I included a handwritten note one the back of the picture telling my mom this because you really can’t ever say thank you enough.
The Imbornto campaign is a powerful way we can all do something to help impact the lives of babies everywhere, because all babies are born to do great things. March of Dimes is helping babies start life growing healthy and strong and with the #THX2U movement it has never been easier to be a part of this great movement. All you have to do is post why you are thankful for your mom on Instagram or Twitter and use the hashtag and a donation will be made! So tell your mom why she is amazing and be a part of helping our children to do great things by starting life strong.



Leanne says
I love bead board and these frames are perfect for any decor. I love the color of the blue one. What a sweet message to your mom on the back of the picture.
Kimber says
Thank you Leanne! I try to paint anything and everything that color my husband will let me get away with. He doesn’t love color nearly as much as me!
Holly says
So great as always Kimber! Awesome step-out tutorials too. Thanks for sharing this- Holly 🙂
Kimber says
Thank you Holly! This is one project that was so fun to share because I absolutely love the result!
Bonnie @ Uncommon Designs says
This is lovely! The beadboard is the perfect touch!
Kimber says
You can never have enough beadboard in my opinion! Thanks for the kind words!
Melissa@TheHappierHomemaker says
This is so cute-thanks so much for the tutorial, it’s at the top of my to-do list now!
kristi@ishouldbemoppingthefloor says
So adorable!! Great project!
Kimber says
Thanks Kristi! I appreciate the kind words!