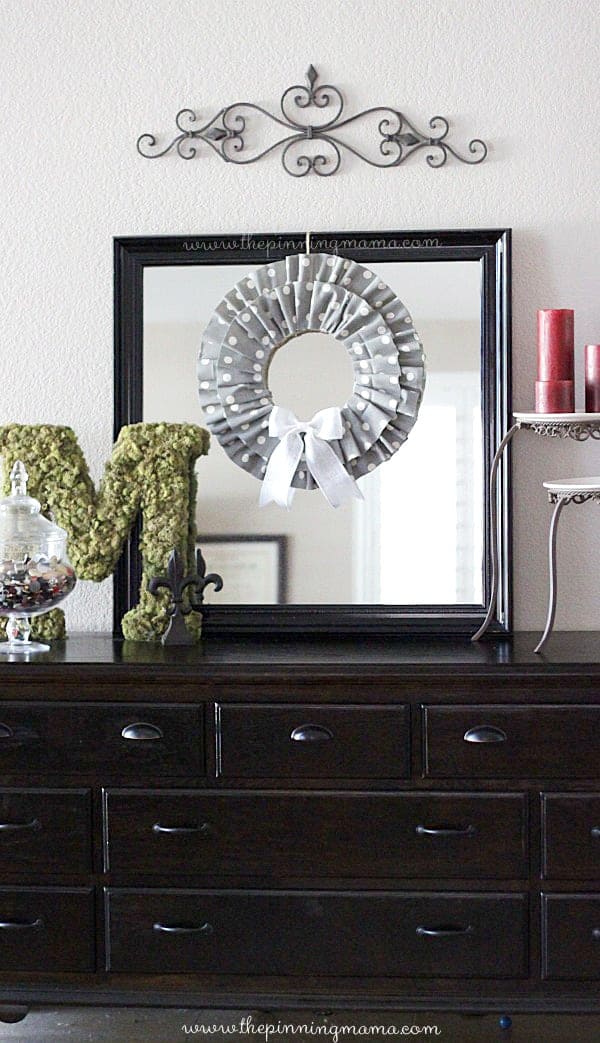
This easy no sew ruffle wreath is an easy and inexpensive craft idea and makes a stunning door decoration! You can make it in any color to decorate for different seasons, holidays, or even sports teams.
I love a nice wreath! On the door, hanging on a mirror, even on the cabinets. Inside, outside, you name it… I could put a wreath on it! I am a little particular about my wreaths though. I am not a big fan of wreaths that are just plain circles. Like any good southern girl, I like my wreath like I like my hair, with a little volume!
I love my burlap wreath because of that very reason. But it was time for a change. After binging on a wreath search on Pinterest I came up with a concept that I thought would be perfect based on the no-sew ruffled Christmas tree skirt I had made. I just knew that the concept would work with a wreath too and it really came out perfectly!
What I love about this style of wreath is that:
- It can be made with any fabric you want to use to coordinate with your decor.
- It is no-sew, all you need is your trusty glue gun.
- You can make it for a total of just a few dollars, which translates into me being able to make one for every season or reason!
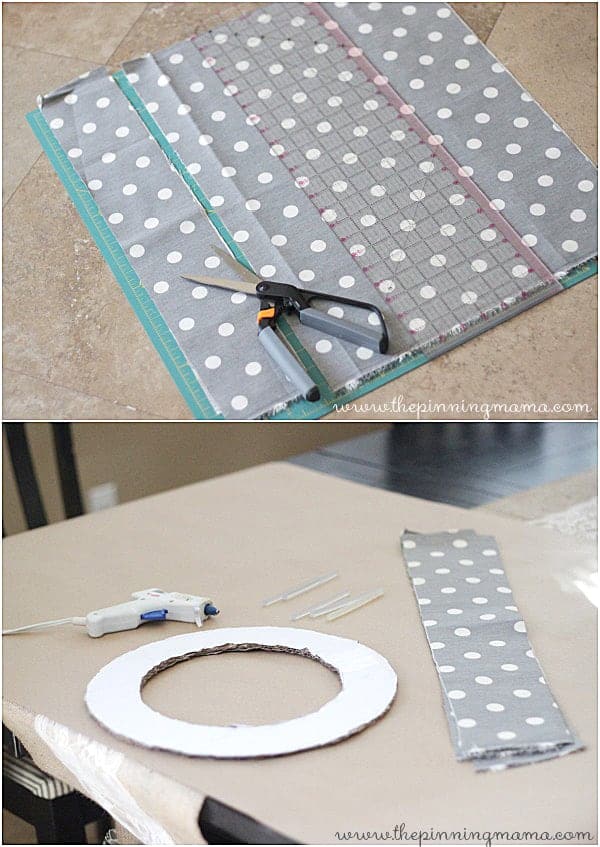
So here is what you need:
- Flat Wreath Form **or** cardboard, scissors and a stencil to cut one yourself
- 1/2 – 1 yard fabric of your choice- stiffer is better but not necessary
- Glue Gun and glue sticks
- Fabric Scissors, or rotary cutter with ruler and mat
- Glue Gun Finger Shields – Not required if you aren’t a fan of having fingerprints.
- Bow
First pick your fabric. I used this grey polka dot duck fabric I got at Hobby Lobby, but a similar one is available on Amazon here. I like the duck fabric at Hobby Lobby because it is a little bit thicker and studier, a bit like canvas. It helps the ruffles stand up nicely out from the wreath. Since the ruffling helps it maintain its form also, the thick fabric isn’t necessary, but it is helpful.
Once you have chosen the fabric, cut it into 4 inch long strips the length of the fabric. I use a rotary cutter with acrylic ruler and cutting mat like this to make it quick and easy. Depending on how big your wreath form is, as well as, how big and/or tight you make your ruffles will change the amount of fabric you need. I usually 4-6 strips on my wreath.
Now you will need to either buy or make a wreath form. You can pick up flat wreath forms on Amazon, at Hobby Lobby in the scrapbooking section, or make your own. I have done them all! I think it is easiest to pick one up, but if you find some round objects to trace, you can easily trace a form on the side of a cardboard box then just cut it out with scissors, like I did here. It takes a little elbow grease to get it cut, but doing this method means you literally make the wreath for the cost of 1/2 yard of fabric and a couple of glue sticks.

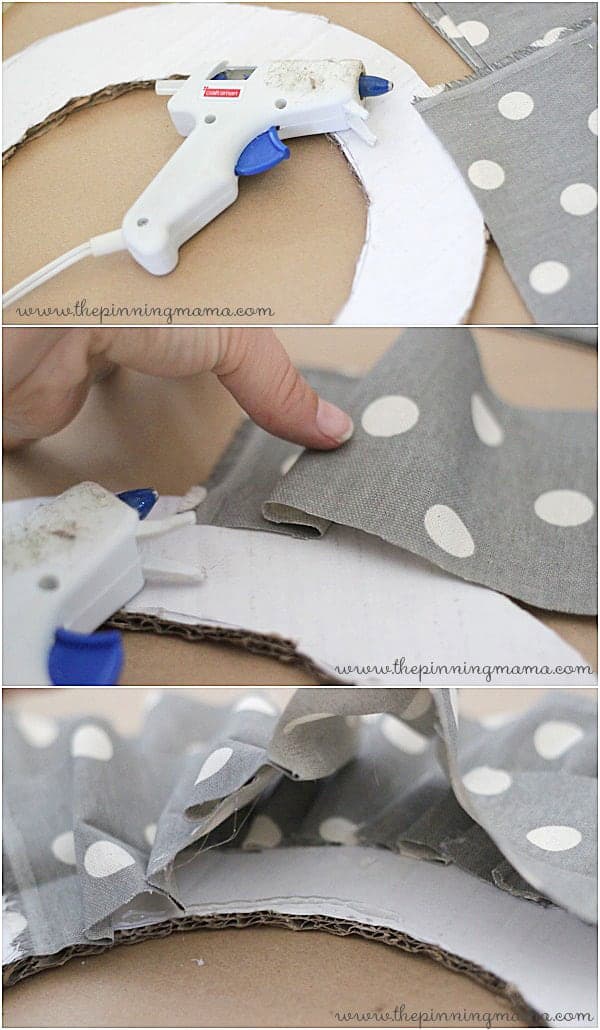
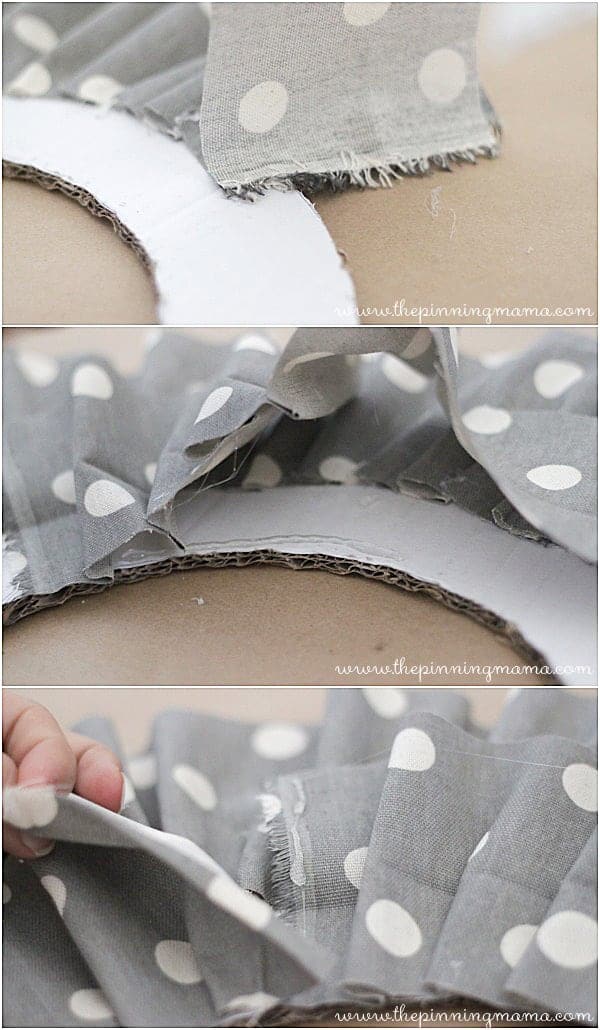
Next create pleats in the fabric and put a dot of glue to hold it secured to the fabric. Make a few of these pleats following the curve of the wreath form then lift it up and put a line of glue on the wreath form to secure the pleated fabric to the form. Repeat this all the way around the wreath.
When you run out of fabric in your first strip, just grab another and continue where you left off by gluing the two “right sides” of the fabric together to create the look of a pleat and then continuing on.
Once you finish the top layer of the wreath, start a second row by gluing the corner of a strip even with the inside circle of the wreath form and create pleats following the curve as you did on the top row.
To finish the wreath I cut the strip when I got back to where I started and then folded in the cut in and glued it down so that the “right sides” of the end piece and the beginning piece were together creating the look of a pleat.
Now all that is left is to add your finishing touches! I added a bow made with my perfect bow method. You could also add a monogram, ornament, or whatever is perfect for the season!


Leave a Comment