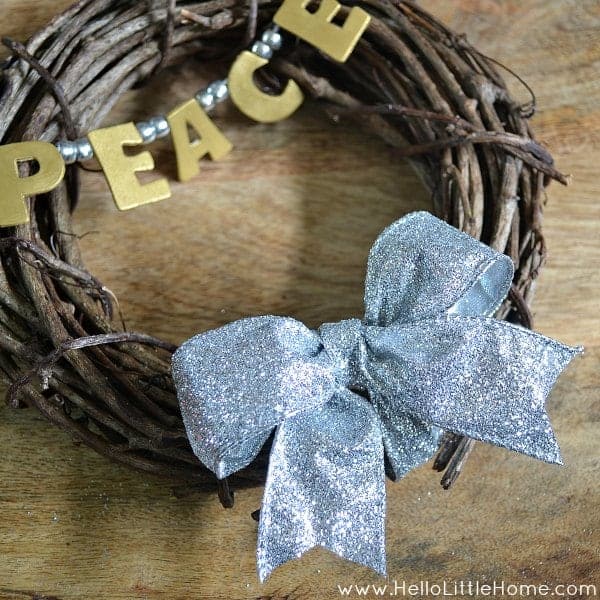
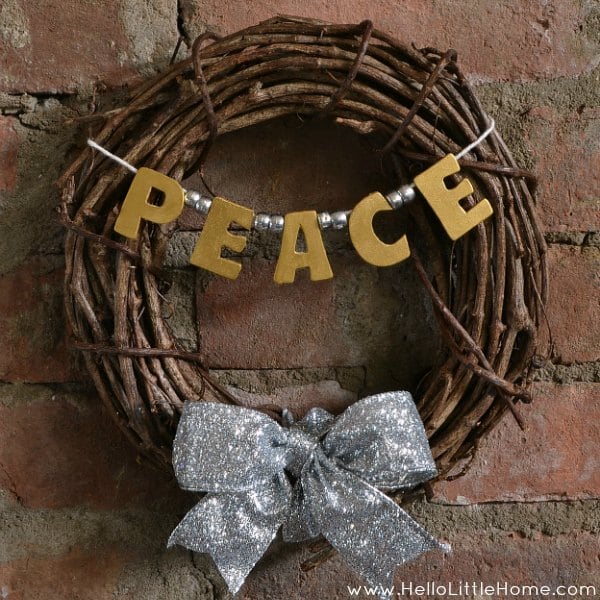
Celebrate the holidays with an easy and inexpensive DIY Mini Silver and Gold Peace Wreath!
Hi, I’m Ginnie from Hello Little Home, and I’m excited to return with a new project. This is my favorite time of year. Everyone is just a little happier, beautiful lights line the streets, and I don’t need any excuse to indulge in my favorite treats!
I love bringing this festivity into my home. Each year, I try to squeeze in a few quick and easy projects to expand my stash of Christmas decorations.
Wreaths are always fun to make, but they can get expensive quickly. This year, I challenged myself to create one that didn’t take a lot of time or money. My Mini Silver and Gold Peace Wreath is the result!
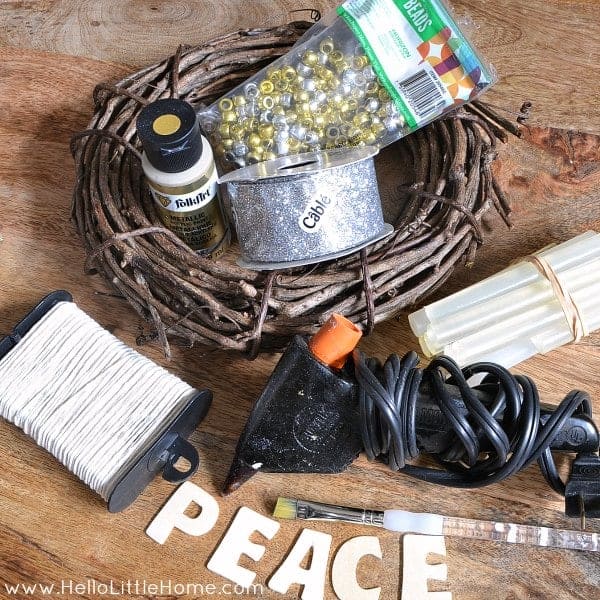
Would you like to make your own? Here’s what you’ll need:
- 1 1/4-inch letters spelling your choice of word
- gold craft paint
- small paint brush
- 8 silver pony beads
- string
- 8-inch grapevine wreath
- hot glue gun
- 1 1/2-inch wired silver ribbon
- scissors
Start by painting the letters gold. Let the paint dry and then add additional coats, if needed. My letters took two coats.
You don’t need to paint the letter backs, but don’t forget to get the sides.
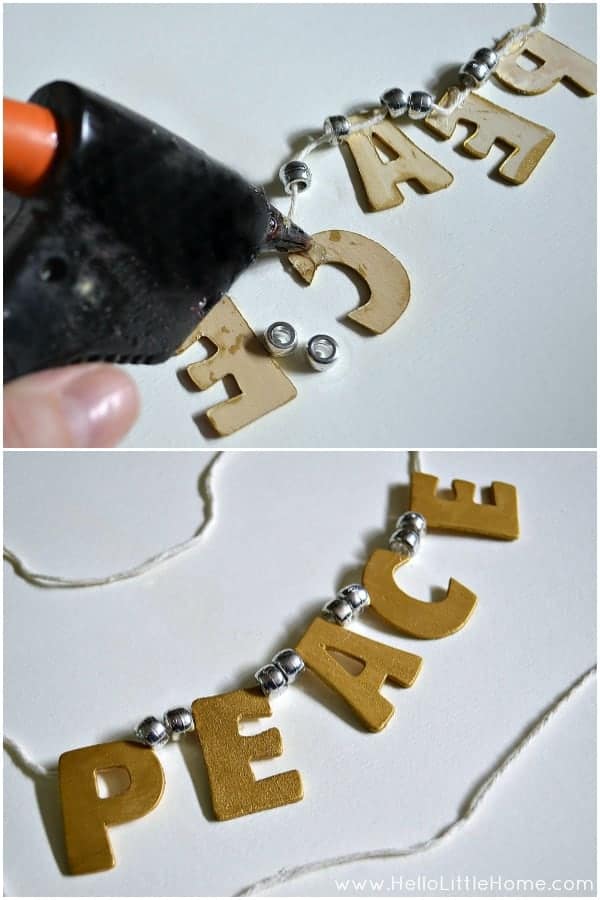
Next lay out your letters, adding two pony beads between each letter. Flip the letters over so the backside is facing up, and switch the order so the “P” is on the right and the second “E” is on the left. This way, after you attach the letters to the string they’ll still be in the correct order.
Cut a long piece of string (two feet is plenty). Apply a thin line of hot glue to the top of the “P” and carefully press the string into the glue. Slide two pony beads onto the string so they sit next to the “P”.
Repeat this process of gluing letters and adding beads until you’ve attached all the letters. Try to avoid crowding the letters and beads together too tightly. The bunting should have a little give and movement.
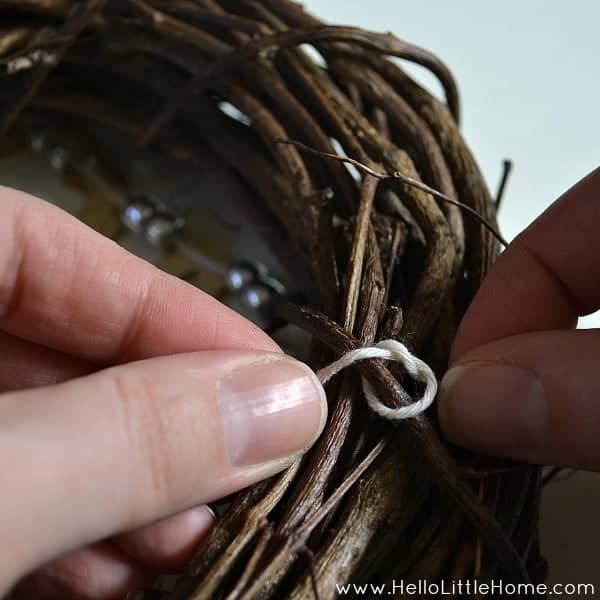
Place the peace bunting over your wreath to determine its position. Once you’re happy, hold the letters in place and flip over the wreath. Tie the bunting to the back of the wreath with a double knot. Repeat on the other side.
The bow is next. Bows can be tricky, but with a little practice you can make a beautiful one. Make sure to use wired ribbon. The wire will help you bend your bow into submission and will hold everything in place.
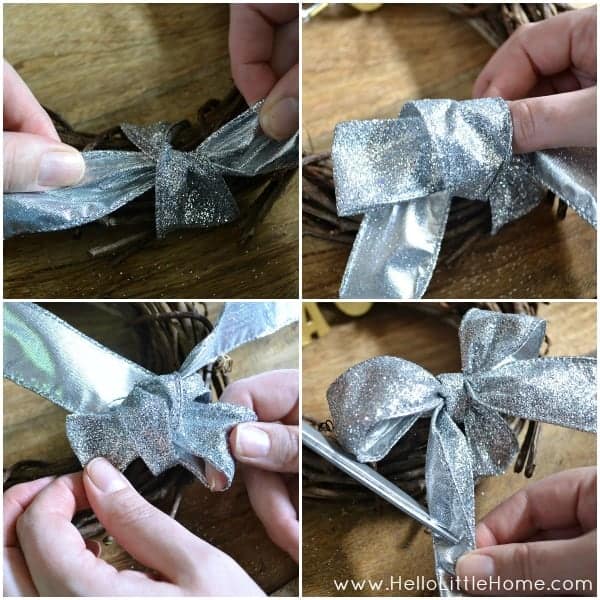
Cut a piece of ribbon about two feet long, and tie it over the bottom center of the wreath with a single knot. Twist the ends of your ribbon so the backside is facing up (upper left picture below).
Loop the ribbon in your right hand so the glitter side faces out. Pull the loop over to the left side of the knot, then wrap the ribbon in your left hand over the loop (upper right picture below).
Pull the ribbon you just wrapped over the loop, through the hole below the loop, creating a new loop on the right side (lower left picture below). Make sure the correct side of the ribbon is facing out.
Twist the free ends so the correct side is facing up, and then pull the bow tight. Play with it until it looks how you want, using the wire to shape the bow.
Finish by bending the ends in half and then trimming them on an angle for a double-pointed end (lower right picture below).
Voila! Your gorgeous Silver and Gold Peace Wreath is finished!
I hung my wreath directly on a nail, but you could also create a picture hook with a little wire. It’s up to you.
I’m so happy with how this wreath turned out. I think I may even make another one so I have a pair to flank a picture over my fireplace.
If you like this mini wreath, you’ll enjoy these projects, too!
Vintage French Map Coasters | Vintage-Inspired Christmas Shadowbox | Personalized Notepads

Facebook | Twitter | Pinterest | Google+ | Instagram | YouTube





Julie says
Oh Ginnie, this is gorgeous! Such a simple and beautiful idea. I can imagine a whole set with all sorts of words, in a cluster of four or maybe in a row on a blank wall. And thanks for the bow advice, I’m forever pinning bow making ideas to help make that elusive “perfect” bow.
Gennie Leeming says
Thank you so much, Julie! I love the idea of grouping a few together. Bows are so tricky, aren’t they?!? 🙂