Welcome Back to Lesson 13. We are making great progress through our bootcamp and I hope you are all learning a lot. Today we are talking about Nesting and how to use it. Last week we learned all about the Kerning feature in Silhouette Studio. Silhouette Boot Camp is filled with mini lessons that help us learn the terminology used in the Silhouette Studio software so that we can cut any design we can dream up with ease!
Before we get started, there are a couple of things to help you get the most of the experience:
- If you are new here, take a look the Silhouette Boot Camp Welcome with all courses listed and catch up on any you missed.
- Sign up for my Silhouette Newsletter which will email you when the lessons are released each week. {click HERE to sign up!}
- Pin this post! Each of these lessons takes me on average, 8-12 hours to create for you. I can do these lessons for FREE thanks to your support in coming to my site, reading the tutorials and sharing it with your friends. By pinning this post or sharing it on Facebook with your Silhouette friends, it helps you know where to find it if you need to reference it again, and it helps me spread the word so that I can keep the resources and freebies FREE to you!
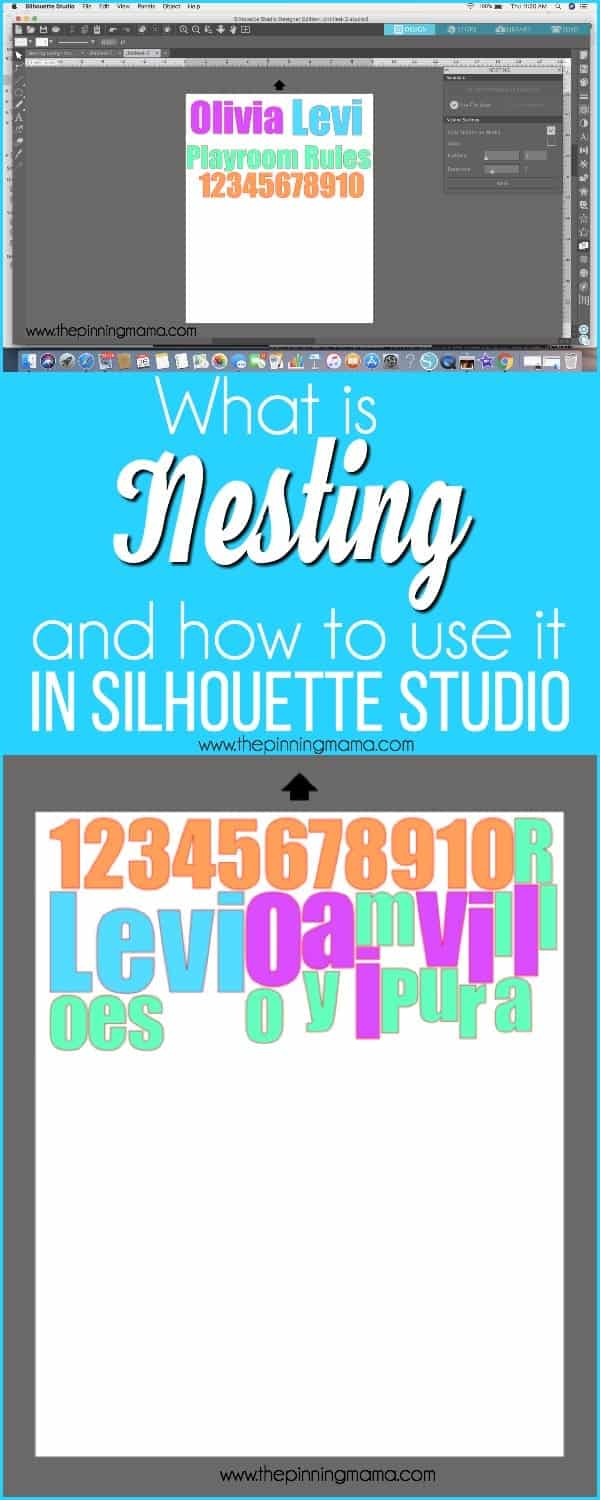
What does Nesting mean in Silhouette Studio?
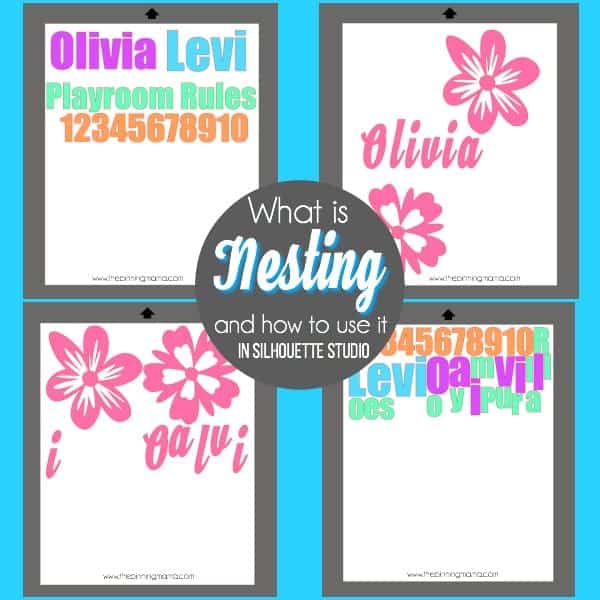
As defined in Silhouette Studio Nesting means to take images and sort them into place to minimize the amount of space used to cut. This is a great feature if you are using very expensive or hard to find vinyl and you don’t want to waste it with wasted space when cutting.
How do I use Nesting?
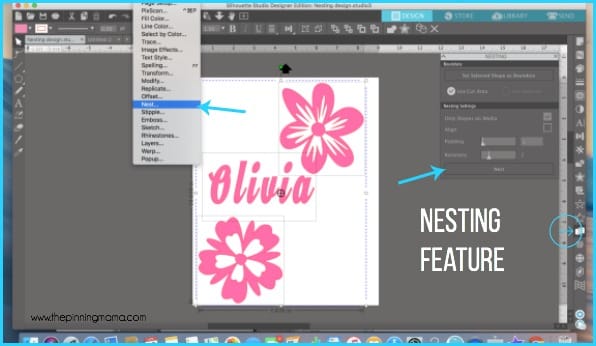
Make sure you have every piece that you want to use in the Nesting feature highlighted. Once you have located the Nesting icon on the right side of the screen, you can click on it to bring up the Nesting window. This is where you can work your magic. Next make sure use the cut area is selected and then hit the Nest button. All of the objects or letters that were highlighted with then be moved into a manner to save space. When you cut it out you can place the objects back where you want them.
Where do I find Nesting in Silhouette Studio?
The Nesting feature can be found in a few different places.
- Top Menu Bar, Click Object, then select Nesting
- The Right Sided Menu, Click on Nesting Icon (two squares puzzled together)
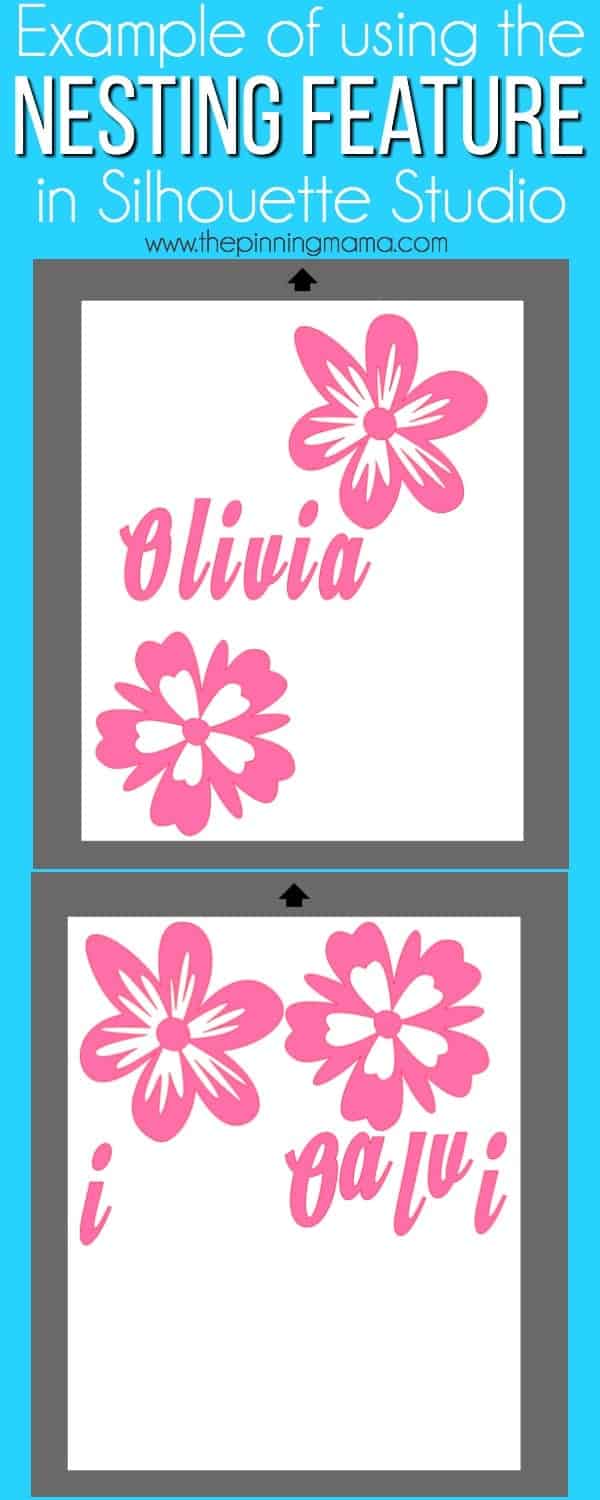
Examples of Nesting:
I wanted to make a cute vinyl cut for the front of my little girls binder at school. I downloaded flowers from The Silhouette Design Store and wrote her name in my favorite font. I wanted to use the least amount of vinyl up I could so I didn’t waste too much. I then follow the steps listed above.
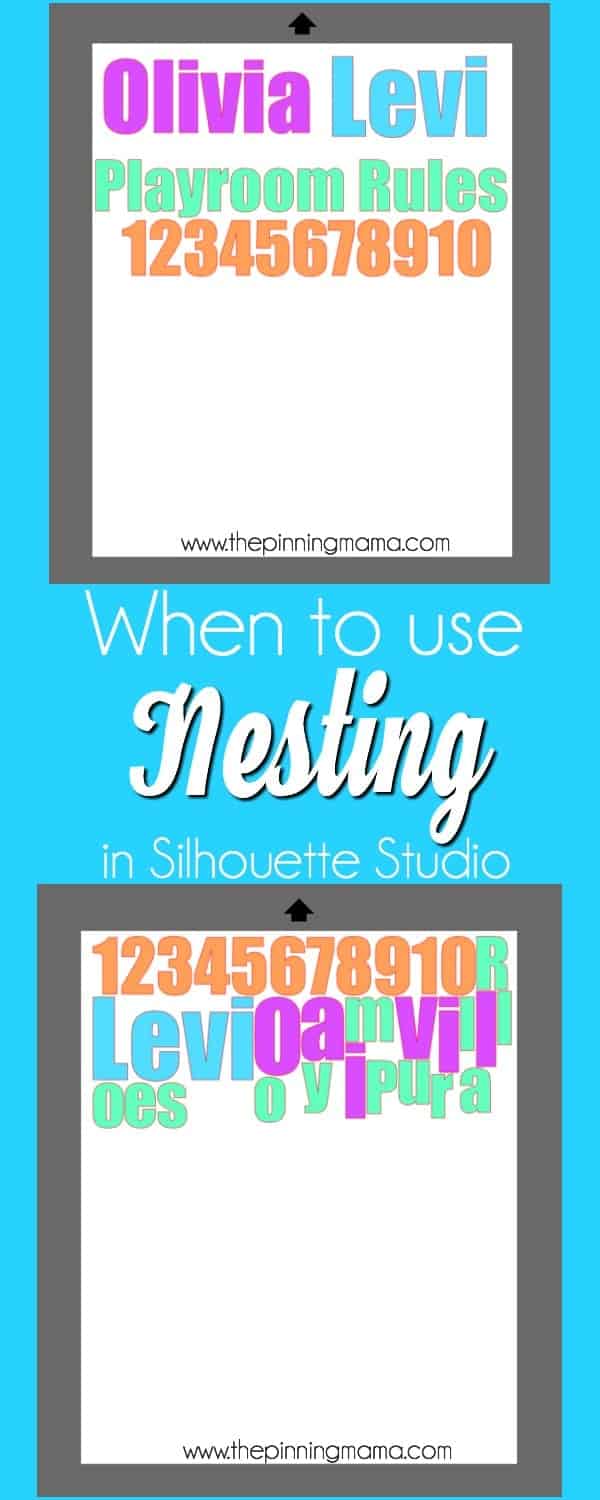
When to use Nesting:
Nesting is most useful when you have a small amount of scraps to use up and only have limited amount of space. It is also useful if you are worried about using expensive pieces of vinyl up too quickly and would like to get the most out of it.
Special Notes on Nesting:
Nesting is a great feature in Silhouette Studio and can save you money over time by not using as much vinyl to cut at any given time. Minimizing waste is a great thing, I’m always so frustrated at the end of a project in how much vinyl I have to waste.
That is all I have for you in lesson 13. I hope you found this lesson useful in finding ways to use up all the extra vinyl scraps or save on expensive vinyl. Tune in next week to learn all about the Point Editing feature and how to use them in Silhouette Studio.


Lorraine says
Can you use just scraps on the mat would i have to scan them first then put the lettering in .and thanks for a good lesson look forward to the next one.
Vanna says
I’m assuming when you nest the letters, you have to fix them back by hand?
Emily says
You can use scraps I would just make sure they are lined up correctly so when you cut the design doesn’t go off the vinyl. You could always put your measurements into your design page to make sure it fits.