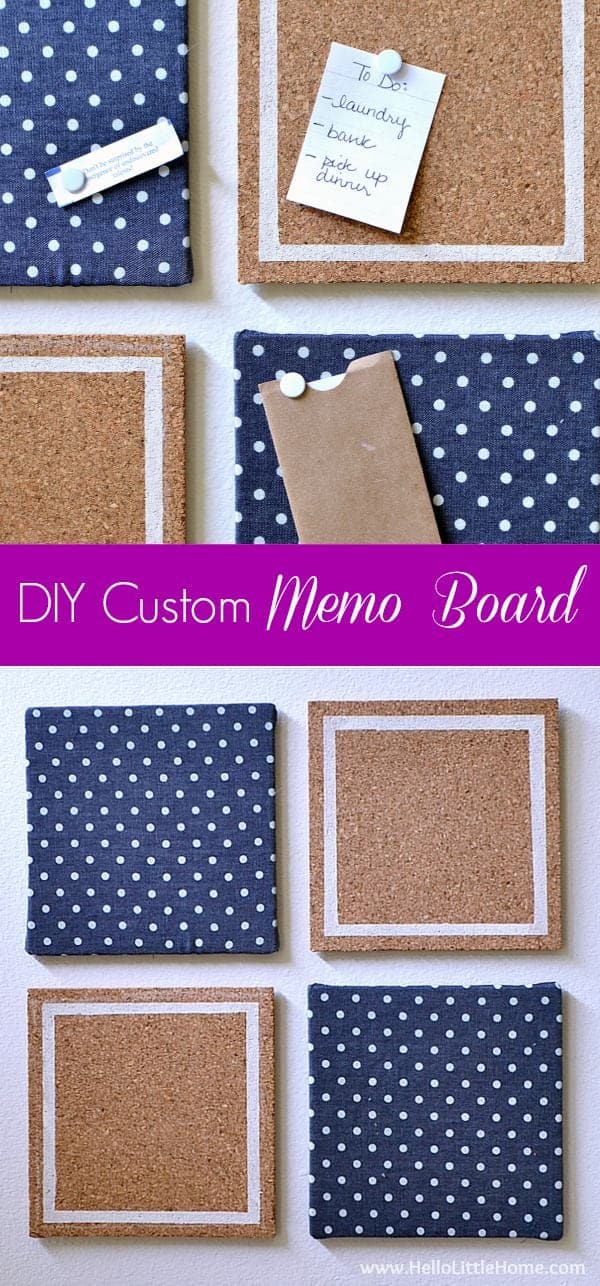
This DIY custom memo makes getting organized fun!
Hi, Ginnie from Hello Little Home here! Although I love being organized, keeping my home neat has always been a challenge for me. I can think of more fun ways to spend my time … know what I mean?
My desk needs some serious attention though. I don’t have a lot of space, so I wanted to do something with all the little items that clutter up my desktop.
A memo board seemed like the perfect solution!
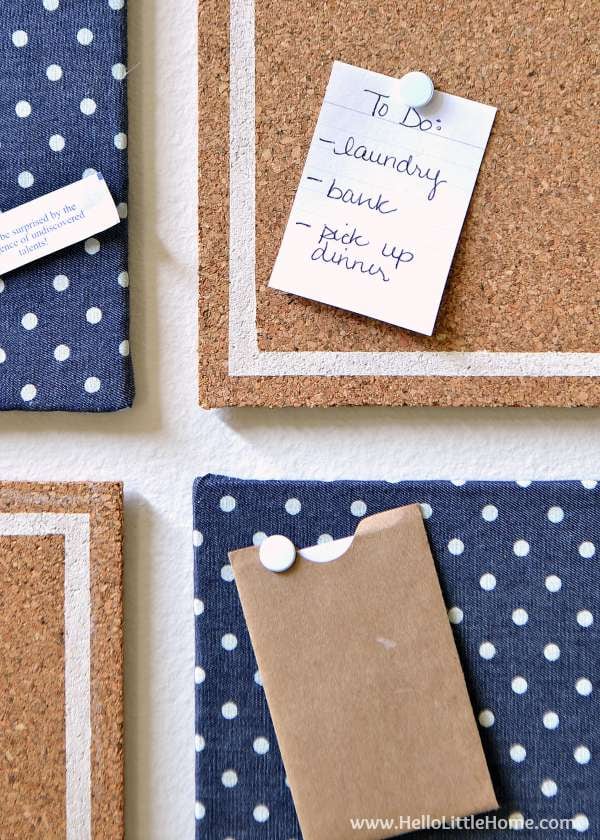
I decided to make one myself. I had four cork tiles, and I covered two with fabric and painted the other two. My memo board turned out so cute, plus it only took a few minutes to make!
Want to make your own DIY custom memo board? Here’s what you’ll need.
- cork tiles
- fabric
- hot glue gun
- painters tape
- craft paint
- foam brush
- adhesive mounting squares
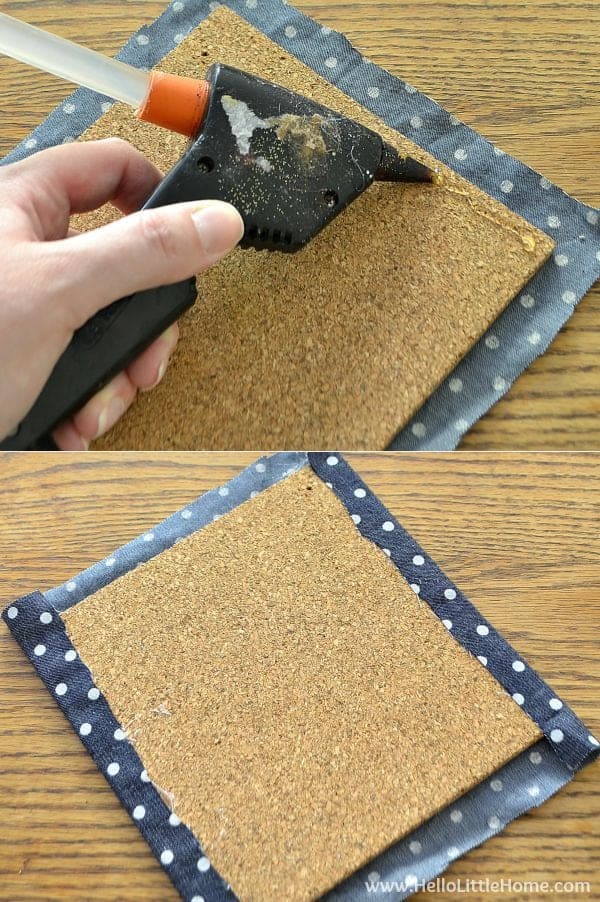
Start by cutting out the fabric to cover the tiles. You want to leave a border that’s wide enough to wrap around the back of your tile.
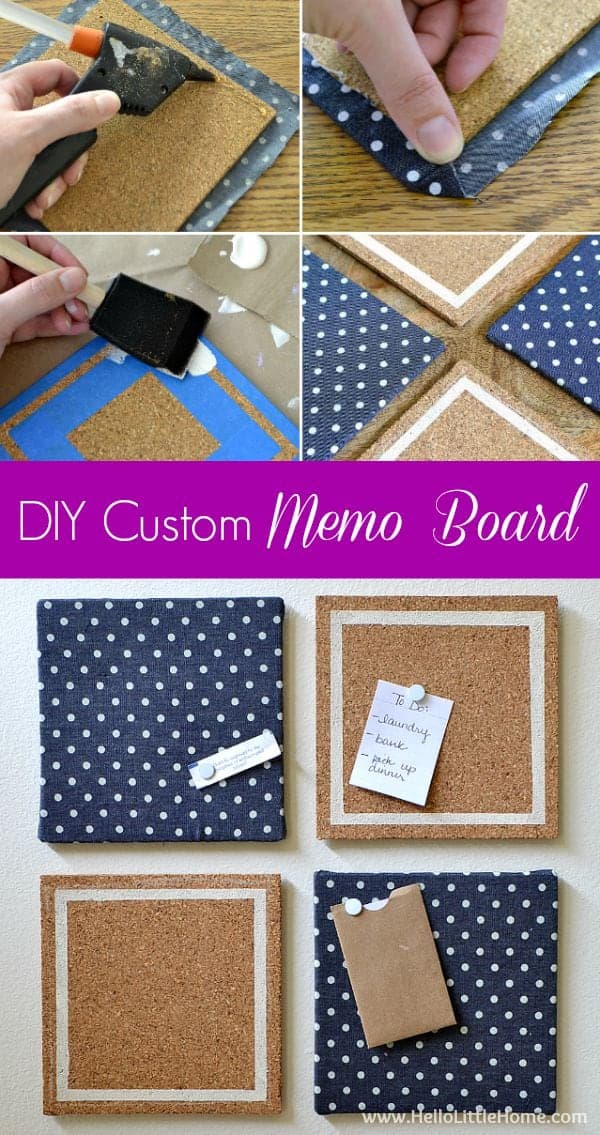
Center your tile on the fabric, then run a line of hot glue along one side of the tile. Fold the fabric over the glue and press to seal.
Run another line of glue along the opposite side of the tile. Pulling fabric taut, press onto glue. Don’t mind my glue gun … its ancient!
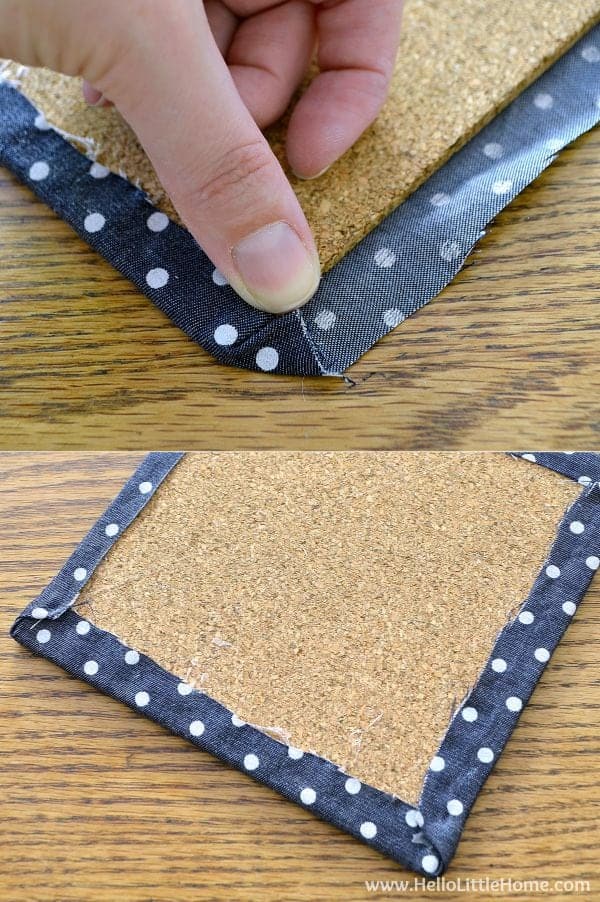
To do the corners, fold them in – kind of like you would when wrapping present – and hot glue in place.
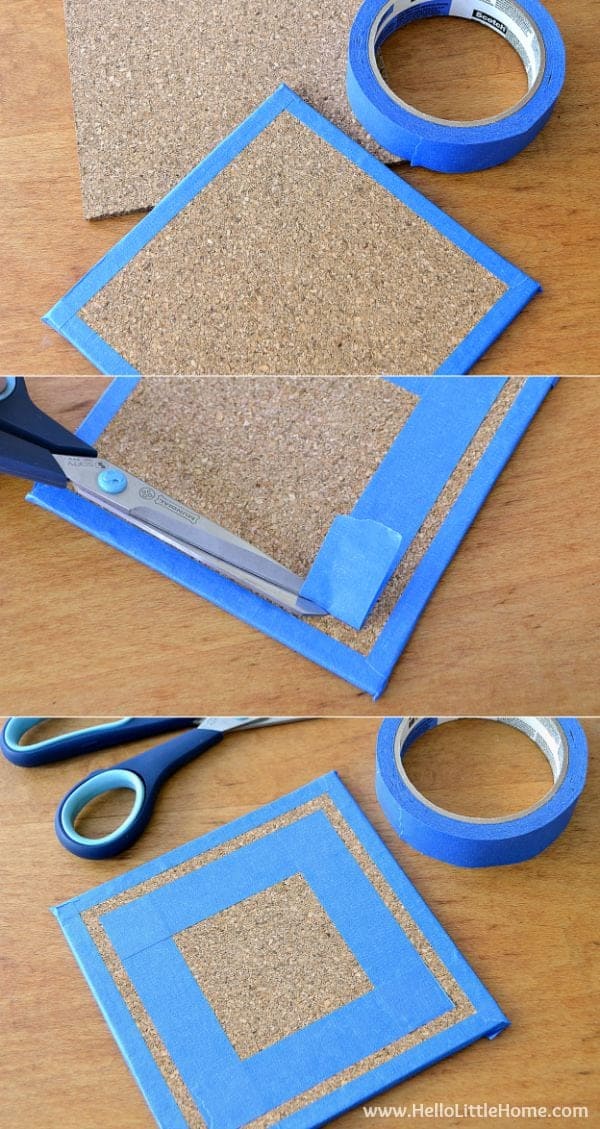
For the painted squares, you’ll need the painters tape. Start by taping a border around the outside edge of the tiles. Mine was about 1/2-inch wide.
About 1/2-inch away from this border, add another row of tape on the inside of the tile. When you are finished, you should have a two separate layers of tape with a plain cork border in between.
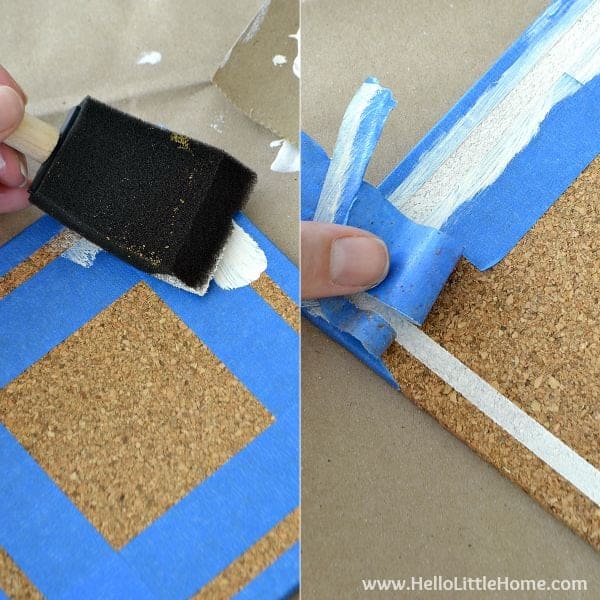
Use a foam brush to paint over the cork that is not covered with tape. When you’re finished, remove the painters tape to reveal a border around the cork tile.
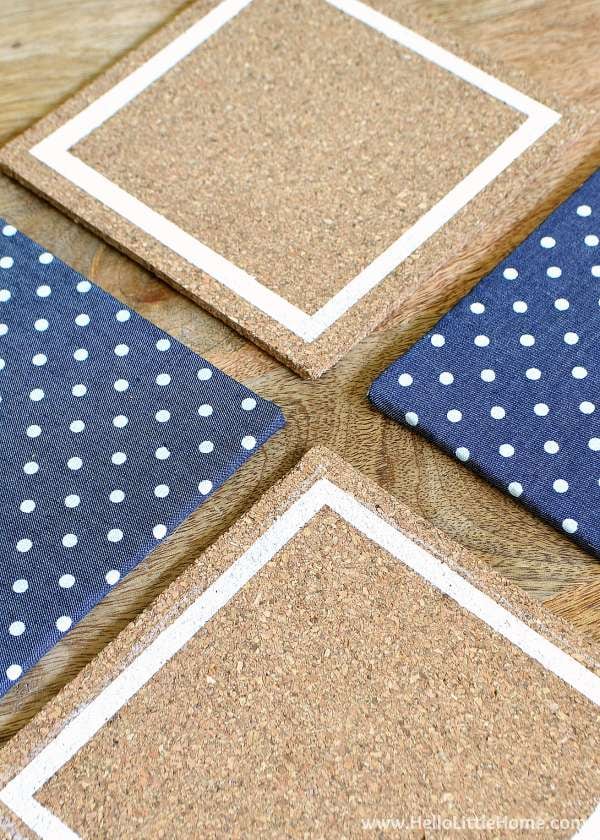
I love how the white border complements the polka dots on the fabric covered tiles!
This project can be customized with different fabrics and paint colors. You could even paint a different pattern on the tiles. Stripes would be so fun!
To attach the tiles to my wall, I stuck removable wall mounting squares to the back of the tiles. It was super easy, and my walls won’t be damaged if I ever decide to take down the memo board.
My DIY custom memo board is the perfect place to store odds and ends, to do lists, and even gift cards (I’m notorious for losing those!).
Vintage Number Sign | Picture Frame Makeover | Tote Bag Makeover

Facebook | Twitter | Pinterest | Google+ | Instagram | YouTube




Leave a Comment