Painting a frame around large objects on your wall is an affordable way to make a statement in a room with large scale decor!
I am proud to be a 3M, Behr®, and Wooster® – sponsored blogger, and, as part of my responsibilities, I get the opportunity to evaluate products. Opinions are my own and additional product used in the project were selected by me.
My daughter recently turned two and so my mind has been churning with thoughts of transitioning to a big girl room. Will we keep her in her current room, or will we move her to the other bedroom? Do we buy a toddler bed or put her in the queen sized bed we already have? Will we paint? How will we decorate?
Well, with the baby looming it was time to make some decisions- so phase one began. I decided to start with what I did know I wanted. One of my favorite pieces in her nursery was this giant moss covered monogram I made before she was born. It has been hanging above her crib since she was born and I have always loved the way it looked. When I originally designed the nursery, I wanted to frame the monogram, but I found that it was such a large scale that the frame would be very pricey and HUGE! Since I didn’t know how long we would be using it, I didn’t want to make such a huge investment, but during those late nights and long hours spent in the nursery I always kind of wished I had framed it.
I knew I wanted to move the monogram, but I also knew it needed to be framed this time! But with all of those hours spent dwelling on the fact that it should have been framed, I came up with the idea of painting a frame around it instead of buying such a large frame! It was the perfect solution because 1. It is far more affordable 2. I don’t have to hang something big and heavy over the bed and 3. I can incorporate the colors of the room into it without having to paint the entire room so when we move it will be easy to cover up quickly.
For the size of the project, it was surprisingly simple and took two days to complete, only due to drying times between the contrasting colors in the design.
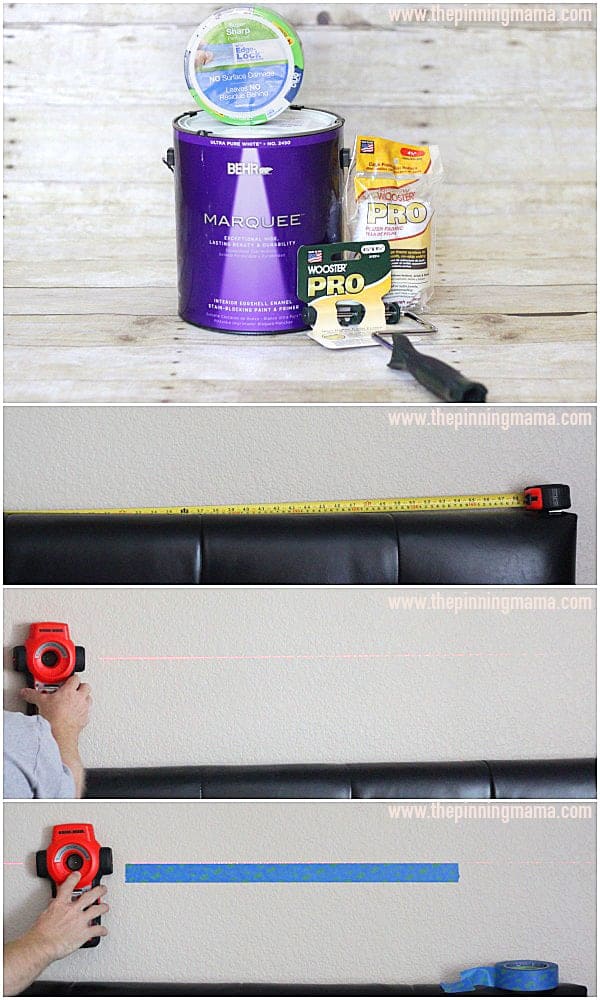
So here is what you need: {I picked up all of my supplies at The Home Depot}
- ScotchBlue™ Painter’s Tape – since my walls are heavily textured, I used ScotchBlue™ Painter’s Tape Advanced Multi-Surface with Edge-Lock™ Paint Line Protector 2093EL
- 1 Quart each of two contrasting colors of Behr® Marquee™ Paint – I used Stolen Kiss (#MQ3-34) and Noble Blush (MQ4-4)
- Wooster® Brushes Pro Cage Frame Mini Roller – 4 1/2″
- Wooster® Brushes Pro 2″ Thin Angle Sash Paint Brush
- Tape Measure
- Laser Level
- Pencil
Before you dive into painting this project takes a little preplanning. First measure your monogram, or decor you want to frame and write down the measurements of the width and height. For my monogram it was 44″ wide and 23.5″ high.
Next you will want to compare this to the place you will be hanging the decor and any furniture it will be over or around. I wanted the monogram over the bed so I needed to create the frame in the space above the headboard between the ceiling and headboard. I also wanted to make sure that the frame was smaller than the width of the headboard so it would look to scale to the furniture when it was finished. I decided to add 2 inches to each side of the width and 1.5″ to each side of the height to create the inner part of the frame making the inner rectangle a total of 48″ x 26.5.”
After that you will want to measure the area you want to hang the piece, in my case the headboard, to find the middle and make a mark with your pencil. Divide the width in half and measure each side from the center point and make another mark with your pencil to note where the corners of your frame will be. For my frame I divided the width (48″) in half (24″) and measured 24″ from the center point left, made a mark, and from the center point right and made a mark.
Measure from the center point on bottom of your frame up the height of the frame, for me this was 26.5″ and mark the top center point and repeat the process to mark each corner on the top of the rectangle.
At this point you should have your four corners marked. You can now use a laser level to create a line across the wall on the bottom edge of your frame and while it is there apply the bottom border of the ScotchBlue™ Painter’s Tape.
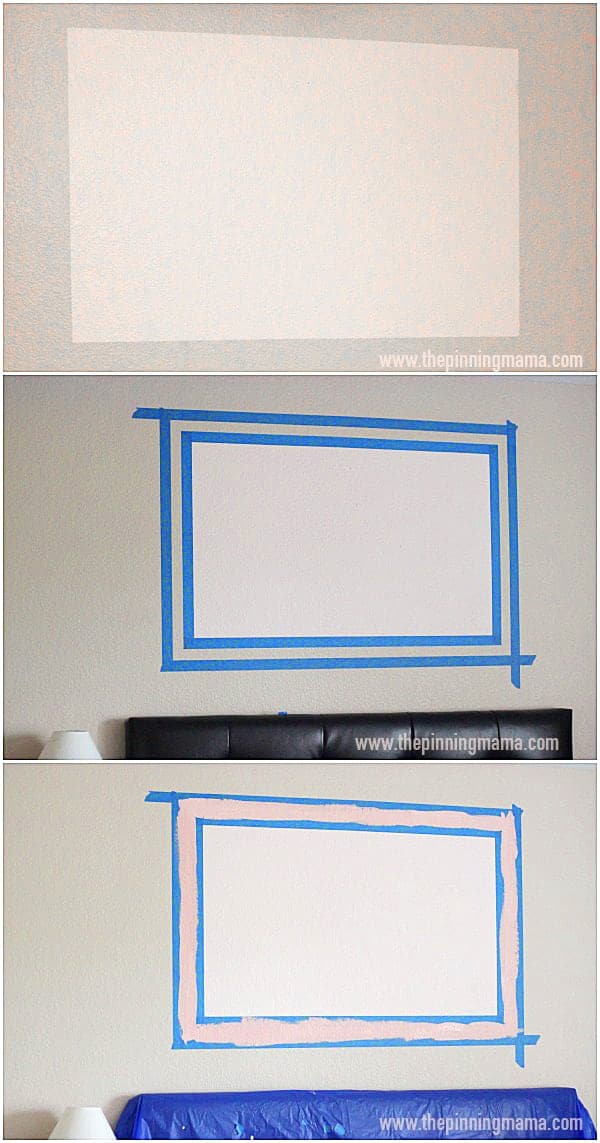
Repeat this process with the top border and then use the pencil marks on the corners to create a straight line of tape to form the left and right side of the rectangle.
Now you are ready to start painting! Use your Wooster® Pro Cage Frame Mini Roller to paint a coat of the first color of paint to cover the inside of the rectangle. The Behr® Marquee™ paint I used included a primer so I was able to get away with only one coat, however if you are painting over a darker color or a pattern, you might need to repeat this step until you get a nice even coat of paint.
Let the paint dry and then carefully peel off the tape.
To form the outer part of the frame first apply tape just inside the paint line of the rectangle you just painted around all sides. Next you can use your tape measure and level to mark the width of the outer frame around each edge and then apply the tape on each of the four edges to create the outer border of the frame. I made the outer edge of my frame 1.5″ wide.
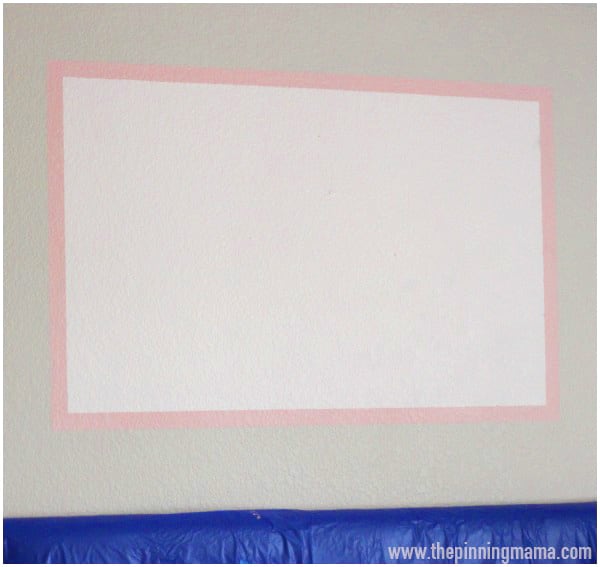
Paint the frame with your second paint color repeating as needed until it is even. Let the paint dry and carefully remove the tape and you should have a perfect two-tone frame accent painted on your wall!
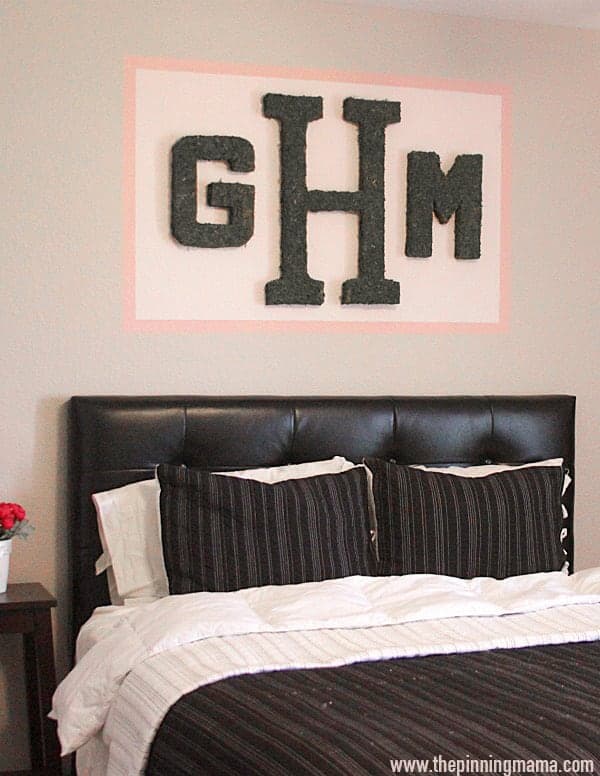
The last step is hanging your decor in the middle. Since mine was hanging over the bed, I did need to be very careful what I hung. The monogram letters are made of foam and weigh less than an ounce each. Please don’t hang anything with much weight to it over a bed! With a hammer and a few nails we were in business with our beautiful new accent wall!
For more ideas, make sure to check out the “Get It, Got It, Go” Blog Hop featuring more fabulous projects!

“Get It, Got It, Go” Summer Blog Hop
320 Sycamore: Front Porch Project
Simply Designing: DIY Board & Batten
Brooklyn Limestone: Farmer’s Market Display Stand
Fave Crafts: DIY Aztec Planters
Studio Pebbles: Faux Frame Modern Art
Whipperberry: BBQ Tool Storage
Dukes & Duchesses: Color Block Umbrella Table
HoneyBear Lane: Patriotic Lanterns
Uncommon Designs: Striped Workbench
Also, you can always get plenty of inspiration every day from The Home Depot, and ScotchBlue™ Painter’s Tape, Behr® Paint , and Wooster® Brushes .
The Home Depot Facebook
The Home Depot Twitter
The Home Depot Pinterest
ScotchBlue™ Facebook
ScotchBlue™ Twitter
ScotchBlue™ Pinterest


Layne says
Super cute – I love how simple it is to make such a stunning piece! Thanks for sharing.