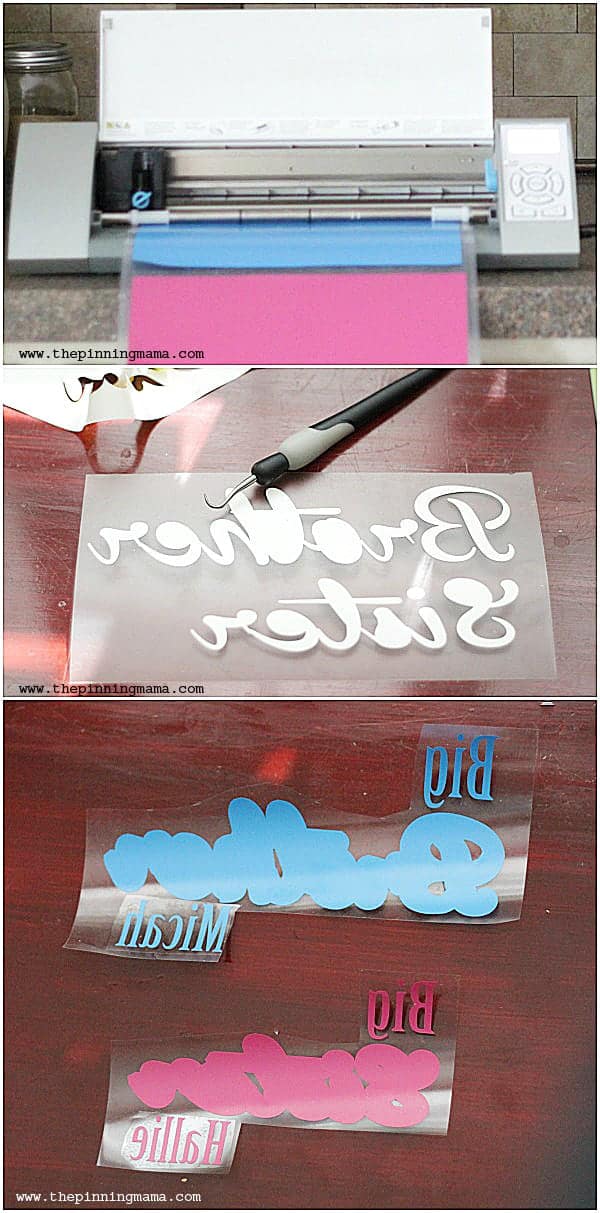
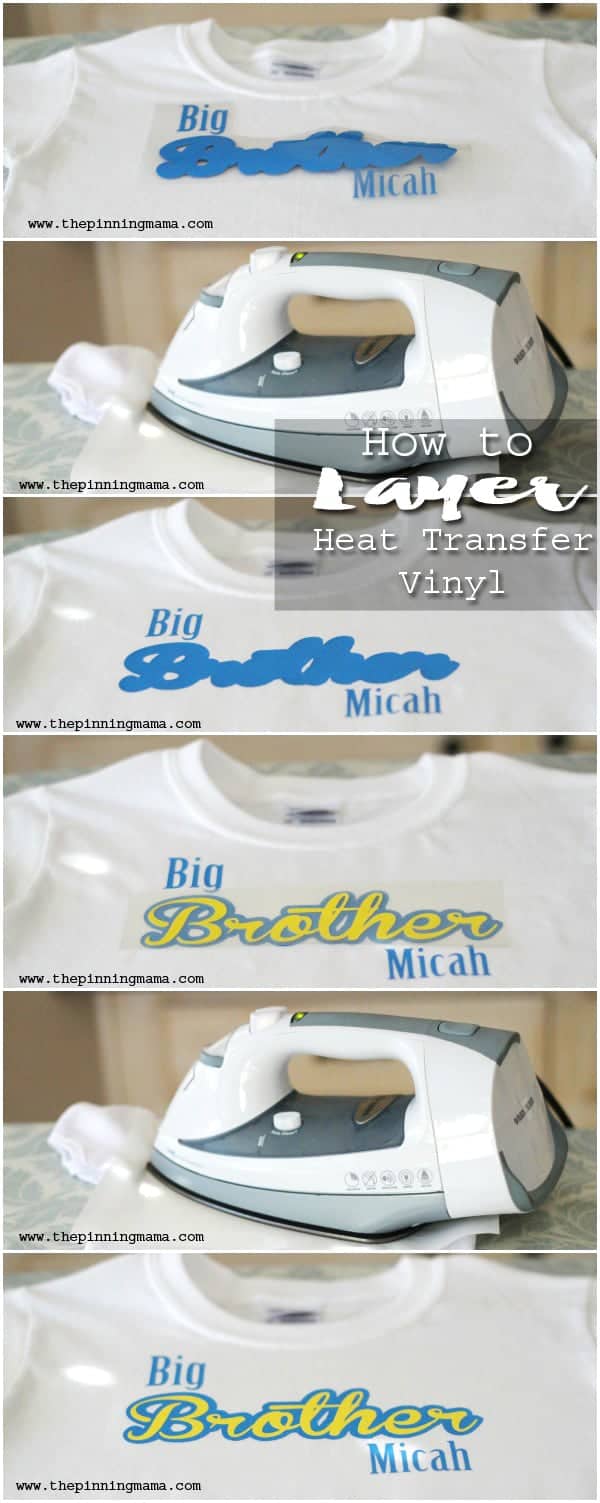
A simple tutorial on how to layer heat transfer vinyl with your Silhouette CAMEO or Cricut machine. Just a few simple steps let you layer vinyl into multicolored creations.
******* BREAKING NEWS: I have been so overwhelmed at the response to this post and all the people who have told me that they LOVE this project that I decided to start an Instagram account (like today) dedicated to bringing you craft and DIY project inspiration right in your Instagram fedd! Find me on IG as @CraftInspired *******
One of my favorite projects I have done with my Silhouette CAMEO are these Big Brother Big Sister shirts. Maybe it is sentimental, or maybe it is just because they are so darn cute, but either way, they were another quick and easy craft thanks to my Silhouette.
I remember when I had my daughter going into a panic two days before labor because I hadn’t thought about what my son would wear when he came to meet his new little sister. This may seem really silly to you as a rational person sitting there reading this, but to a 40 week pregnant woman, this was a near crisis! My very sweet friend Anna dropped everything she was doing and rescued me and helped me hand make a Big Brother shirt. So when baby three was nearing his entrance I knew there was no procrastinating on the outfits for the Big Bro and Big Sis!
Luckily between the time my second was born and the time my third was born I became not only a Silhouette user, but also their biggest fan. I knew I could whip up shirts for them in no time.
To make make these Big Brother Big Sister Shirts you will need these materials:
- T-shirt
- Silhouette CAMEO or Silhouette Portrait
- Heat Transfer Vinyl in Multiple Colors- Heat Transfer on Amazon or Heat Transfer at Silhouette Store {If you are new to Heat Transfer you might want the Heat Transfer Starter Kit}
- Iron
- Hard Surface
- Parchment Paper or Towel for Ironing
Of course I had “a vision” for these shirts. And of course this vision included something I didn’t know how to do, much less if it could even be done. I wanted a multi colored vinyl design featuring the brother and sister.
So I started brainstorming and then researching and found that layering heat transfer material was quick and easy and results in an awesome final result!
To start, if you are new to Heat Transfer Vinyl check out all my Heat Transfer Tips and Tricks here.
I wanted to layer an outline of text. I found out you can create this effect using the offset feature of the Silhouette Design Software to see how to use the offset feature to create outlined text click here.
Once I had the shirt designed in the Silhouette Designer Edition Software, I cut each piece out using heat transfer vinyl in the color I wanted. {I have a Beginners Guide to Heat Transfer here if you are unfamiliar!} Once it was cut I used my hook tool to weed the vinyl.
Now it is time to start placing the design on the shirt. Line up you base color on to the shirt. Iron the design onto the shirt and peel back the plastic.
Next line up the inset color on the piece you just ironed on and then iron that piece right on top of the outer piece just as you did the first. Peel off the clear backing.
Really that is all there is to layering HTV! Iron on your base piece, peel backing off, line up your next piece, peel backing off, repeat for any remaining colors.
Seems almost too good to be true for such a professional result, but I assure you it is just that easy!


Michelle says
I want to outline with laying it on top so that there is space between to the two colors. How can I do that?
Robert says
Just wanted to let you know I repinned your pin to this blog. It is going viral like crazy. Congrats. I wish I could replicate your success.